.png?height=120&name=rockcontent-branco%20(1).png)
Use lookup tables and rules to make visitors enter a password before they are able to advance to your experience. This could be an experience made for internal purposes or one where you would only want certain visitors to have access to content.
Before we begin, you will want to have an understanding of how to create lookup tables within your console. For more information on lookup tables, click here.
For this support post, we will be using the username field as the lookup key and a password field as the lookup value. You can upload a lookup table to your console with the user names and corresponding passwords.
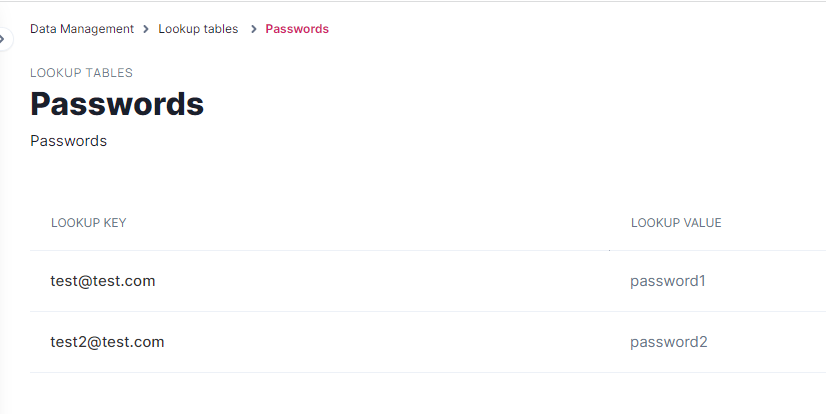
We will be using a lookup table called “Passwords”, which we attached to this post in case you would like to set up an example in your console:
The first step to password-protect your page is to create a form with the two textboxes: username and password. In our example, the username's Data Field is "Email", and the password's Data Field is "Password":
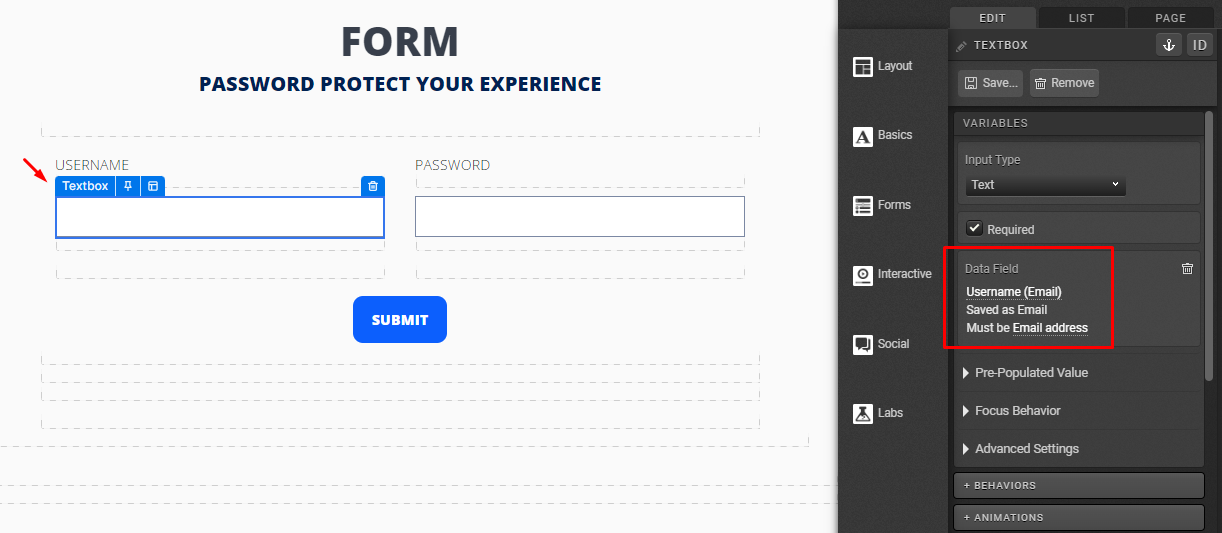
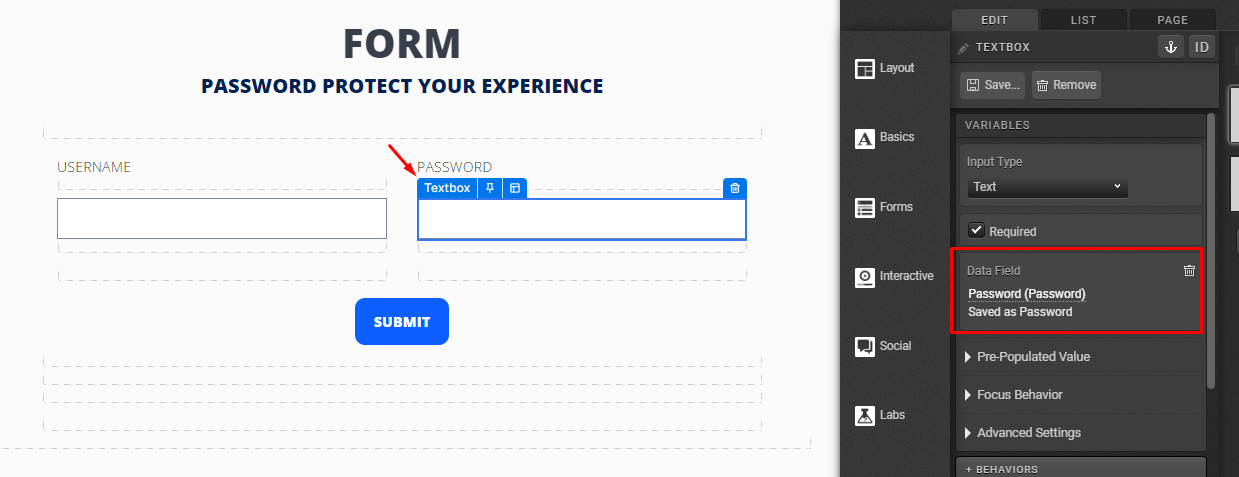
You can create your own data fields, as we did, or use existing ones. Just be aware that the Data Fields' values will have to match the rules afterward.
Then, you will select the submit button and add an action to go to your main content page:
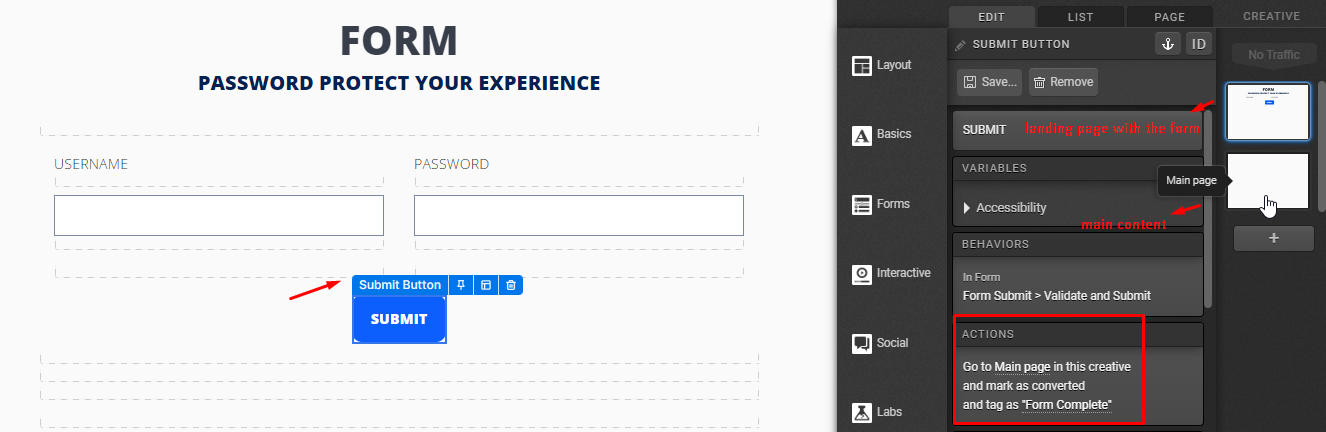
Now, you will add the rules to the submit button. They will check the visitor's data against the lookup table you set up in your console.
The first rule will take users to the correct page (Main page) if the information entered is correct:
Conditions: Lookup table data > Passwords.{{Email}} > equals > {{Password}}
Actions: Go to next page > Main page
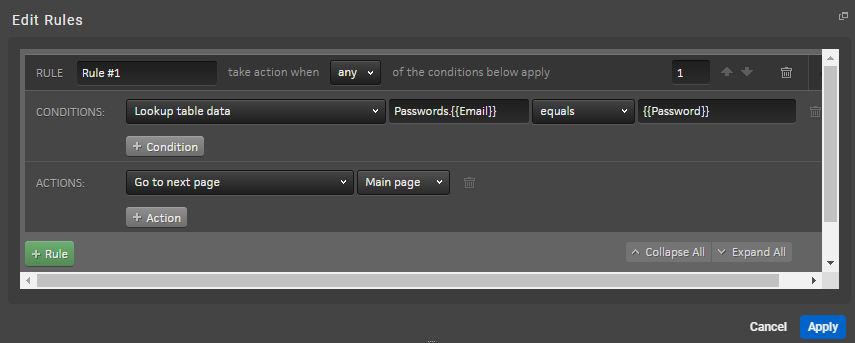
Passwords. (with the dot) refers to the lookup table we created:
The values between double curly braces, {{Email}} and {{Password}}, refer to the Data Fields being used in the form. Remember, the Data Fields used in the form will have to match this part of the rule!
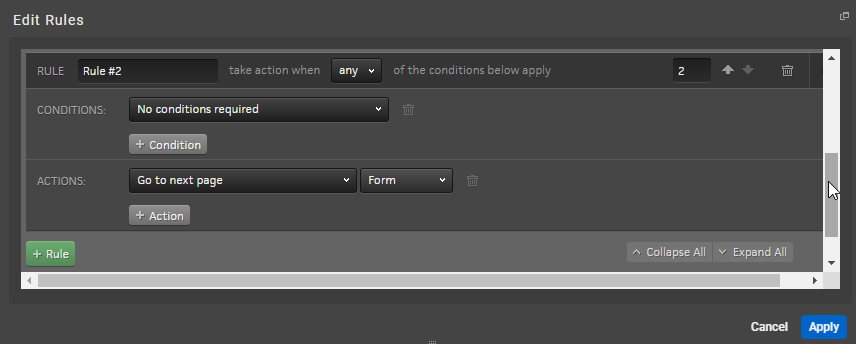
The next rule is for anyone who does not have a valid username and password. It will keep the users on the current page if the information entered is not correct, but you are free to redirect them to a "sorry" page if you wish.
Conditions: No conditions required
Actions: Go to next page > Form
*NOTE: The passwords used in this method will not be case-sensitive. When testing, you will need to use a live URL as this will not function as desired when in a Preview environment.
If you have any questions, please contact us at help@rockcontent.com. 😀