.png?height=120&name=rockcontent-branco%20(1).png)
Rank Math is one of the SEO plugins we use at Rock Content to generate meta tags!
Meta tags make it easy for you to configure the parts of your blog to be readable by Google robots.
![]()
But not only do Google robots read them, social media sites also use them to display your blog posts.
To generate meta tags, the easiest option is to install a plugin. As the latest version of the Yoast SEO plugin is showing bugs to generate meta tags, we created this tutorial for you to learn how to install and configure Rank Math, a plugin that, among other features, creates the meta tags for your blog!
Check out this tutorial on how to install and configure Rank Math.
Do I need to install Rank Math?
Yoast SEO only presented bugs related to meta tags after the release of version 14, so this applies to you in case you have a version equal to or greater than 14.
To find out the version of your Yoast SEO, look at the plugin page inside your site's admin panel:

Below the plugin's description, you can see which version is installed on your blog.
How do I install Rank Math?
The easiest way to install Rank Math is through your blog's WordPress admin panel.
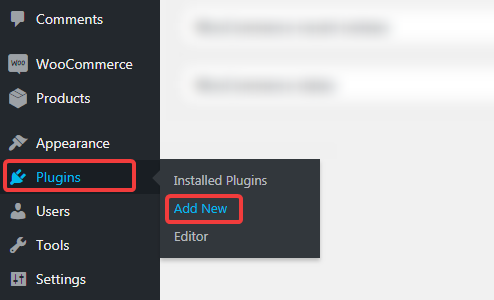
Start by hovering over the plugins option in the WordPress menu and clicking on the "Add new" option.
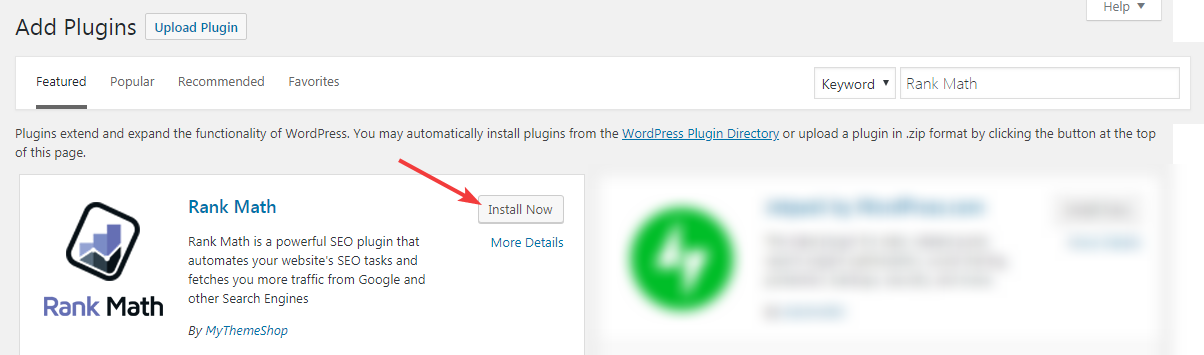
The Add Plugins page will open and the most popular plugins from the repository will be displayed on the screen. In the search field on the right, type "Rank Math". The page will be updated and you will see Rank Math as the first result. Click on the install button to start installing Rank Math.
As soon as you click the install button, the button will show a progress bar to indicate that the installation has started.
![]()
In just a few seconds, the Install button will change to an Activate button. Click the button to complete the installation.
![]()
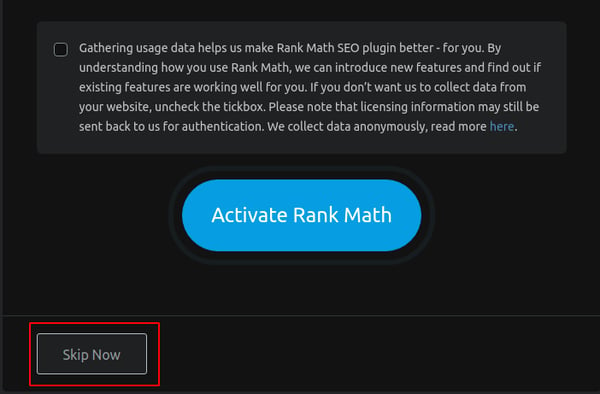
You will be taken to the Rank Math activation page. Click on the Skip Now option to skip that part.
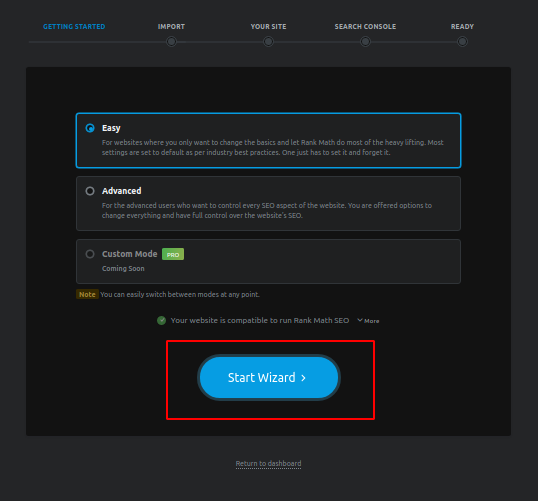
On the next screen, click the blue Start Wizard button.
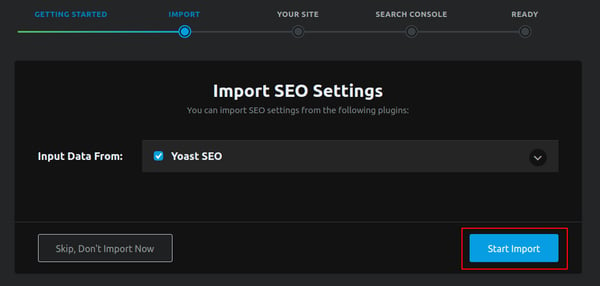
In the next option, you will import your Yoast SEO settings. Simply click on the Start Import option.
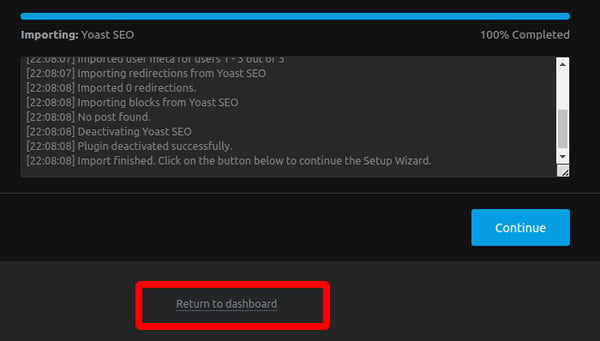
After the bar fills, you just need to click on Return to Dashboard.
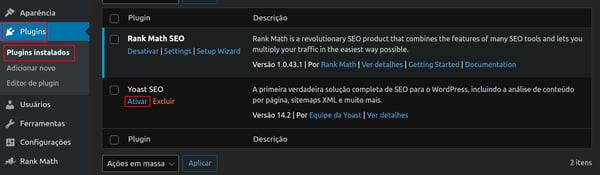
You will still need to reactivate Yoast SEO to use its other optimization options. To do that, click on Plugins > Installed plugins.
Locate the Yoast SEO plugin and click Activate:
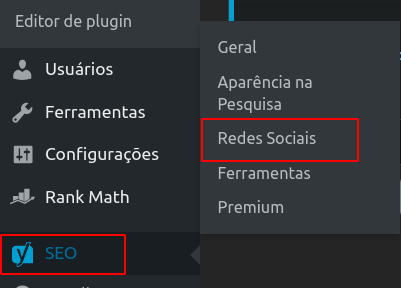
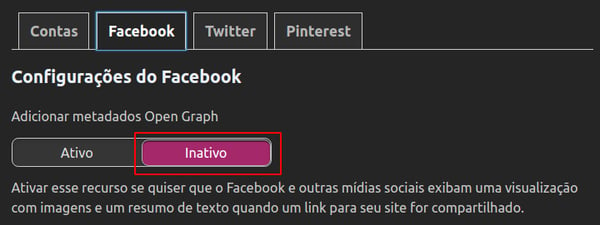
Then, on the SEO option on the left side of the screen, click on Social Networks:
Now click on the Facebook option and check the Inactive option.
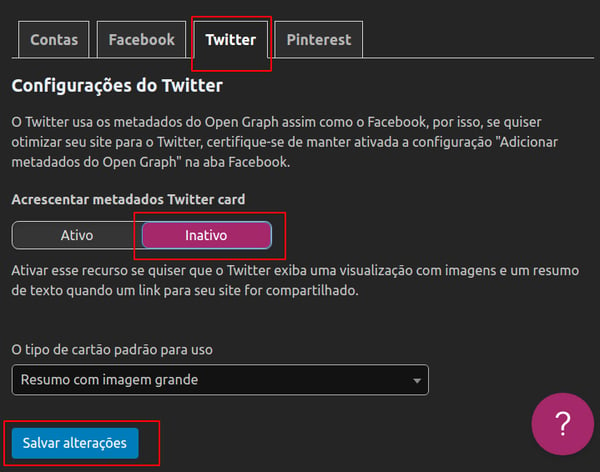
And then in the option Twitter, check the Inactive option and then Save Changes.
All done! Now you have the plugin configured to be able to share your blog content on social media!
Didn't find the solution for your situation in this tutorial? You can check our article with the most common Rock Social mistakes and what you need to do to solve your issues!
Still need help? Simply reach us at help@rockcontent.com or through the chat platform and we will help you!