.png?height=120&name=rockcontent-branco%20(1).png)
Any question you can dream up can be created and included on a form in your ion console. Forms are entirely customizable, and you can build them from scratch.
Before We Begin
Please make sure that all of the data fields you need for your form have been created within your Data Collection screen.
If the fields you want to include on your form are already part of ion, and you just want to create a new form using those existing fields, keep on reading. If you want to create new/custom fields (e.g., questions and answers) for your form, read more about creating data fields here.
Let's Get Started!
To create a form
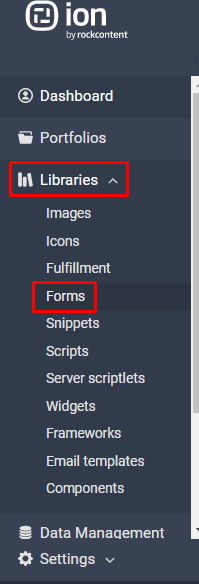
Library forms are set up at the global level so they are available for any page. Just select 'Forms' from the 'Libraries' tab in your console’s side nav to get started.
- Click the green 'New category' button to create a new form category or click the title of an existing category name to add a form to an existing category. Categories are just a way to group and organize your forms (e.g., Contact Forms, Survey Forms, etc.) Descriptions may also be added to categories.
- Click the green 'New form' button then choose a unique form label (title) and optional description. Before clicking save, you have the option to copy form fields from an existing form. If you copy a form, you will still be able to make changes to it; this is a convenient option if there is a similar form already in your library or when creating several versions of the same form.
- Save the form, then click the green 'New form field' button to begin adding the form fields to appear on your form.
- Choose a data field category from the first drop-down menu, then choose the data field from that category in the second drop-down menu.
- Choose the input type for the field—this will determine how the user will provide information on the form. You may choose from single or multi-line text (for free-form questions), checkbox (for multiple choice questions), listbox (for choices to appear in a selector box), radio buttons or dropdown list (for single choice questions). The type of question you are asking will determine the input type.
- For single or multi-line text fields, choose the input style—standard, narrow or wide fields. For multi-line text, you can also specify the line height to be 2-10 lines.
- For radio buttons, drop-down list or listbox, select the choice set category from the first drop-down menu, then choose the choice set to use for this field in the second drop-down menu. For a listbox, you can also specify the input style (narrow, standard or wide) and the line height to be 2-10 lines.
- Check the 'Required' box if a respondent must fill out this field to submit the form. NOTE: as a best practice, add an asterisk (*) or another visual indicator in front of the field label text to clearly distinguish this field from optional fields on the form.
- Enter your label text—this the text that a respondent will see before the form field.
- Add a field hint (optional)—this will appear below or to the right of the field, depending on the form size.
- Add pre-field text (optional)—this is useful to give form information or instructions at the top of the form. (e.g., * indicates required fields)
- Add post-field text (optional)—this will appear below the field label on the form.
- Check the 'Seperator' box if you would like to insert a line separator after a field on the form—this is useful to visually group related fields on a form.
- Click Save and continue adding the remaining fields on your form.
- After you add fields to the form, you can easily reorder them by using your mouse to click and drag the fields to the desired position. Questions on the form will appear in the same order they appear in the form field list. Your form is now ready to use on any path in the ion console! Remember, it’s always a good idea to test your form using preview to make sure it's configured the way you intended. And now that the form is set up, the next step is to create an export for the data you're collecting.
To edit a form
Click the title of the form you'd like to edit.
- To edit the form name, click the Form Actions dropdown menu and then click “Edit form.”
- To edit a form field, click the form field title.
- To delete a field on the form, click the trash can at the far right of the field row.
To delete a form
Simply click the trash can at the far right of the form row from within the form category screen.
NOTE: ion will only allow you to delete an unused form, it cannot be referenced by any creative.