.png?height=120&name=rockcontent-branco%20(1).png)
In this article, we will discuss what suspicious clicks are, why Ion tracks them and the quick steps you can follow to delete this data from your console.
Are your landing pages receiving a high volume of suspicious click traffic from bots and other web crawlers? Periodically deleting this data is important to ensure proper respondent data, track accurate conversion rates, and to stay within your console's capacity. Ion gives you a quick and easy way to delete this data from your console.
What are suspicious clicks?
Suspicious clicks are typically generated by non-human visitors to your pages. These "respondents" may come from search engines bots & crawlers like Google or Bing that need to periodically crawl your creatives for a quality score as well as pings from other bots on the Internet.
Because these pings are treated as unique respondents to your Ion pages, they will dilute your conversion rate and may also cause you to go over your console capacity. Although most bots cannot be automatically recognized, you can remove these clicks from your console.
How does Ion identify suspicious clicks?
The first time a respondent clicks on a URL, Ion records the time and date of their "first contact". An invisible <img> pixel is included at the bottom of the initial page of the creative. When Ion gets the request for that <img>, it updates the "last contact" timestamp for that respondent. A respondent is considered "suspicious" if they requested an initial page on an Ion creative, but then they never fully load the page.
There are two common explanations for this:
- The respondent arrived at the URL with no intention of loading the entire page -- they were (a) clicking on ads just to rack up charges for the advertiser, (b) clicking on affiliate links to rack up rewards, or (c) running an unauthorized "bot" that's scanning pages without loading all the associated resources (i.e., <img> tags). This is generally unwanted traffic.
- The respondent arrived at the URL "honestly," with no ill intent, but they decided to bounce before the landing page loaded completely. This can become more common in scenarios where the page takes more time to load: (a) the page has lots of Javascript or image assets, (b) the respondent has a slow Internet connection, or (c) both. This may be more pronounced in markets such as China where connection speeds can vary significantly.
You have the ability to delete suspicious clicks from your console under the global Settings menu in the "Capacity & monthly traffic" screen. From here, you can delete all suspicious clicks at once manually or automate the deletion of your suspicious clicks.

Removing suspicious clicks
You will want to make sure you remove suspicious clicks from your console at least once per month to ensure your metrics remain pure and to also prevent suspicious clicks from causing you to go over your console’s capacity. Suspicious clicks can be deleted automatically or manually. To delete suspicious clicks from your console, please follow the steps below.
Click the Settings tab at the bottom of your Ion console’s side nav and select “Capacity & monthly traffic” where you have three options to delete suspicious clicks
1. Delete suspicious clicks automatically
- Access: /Admin/Settings/CapacityAndTraffic
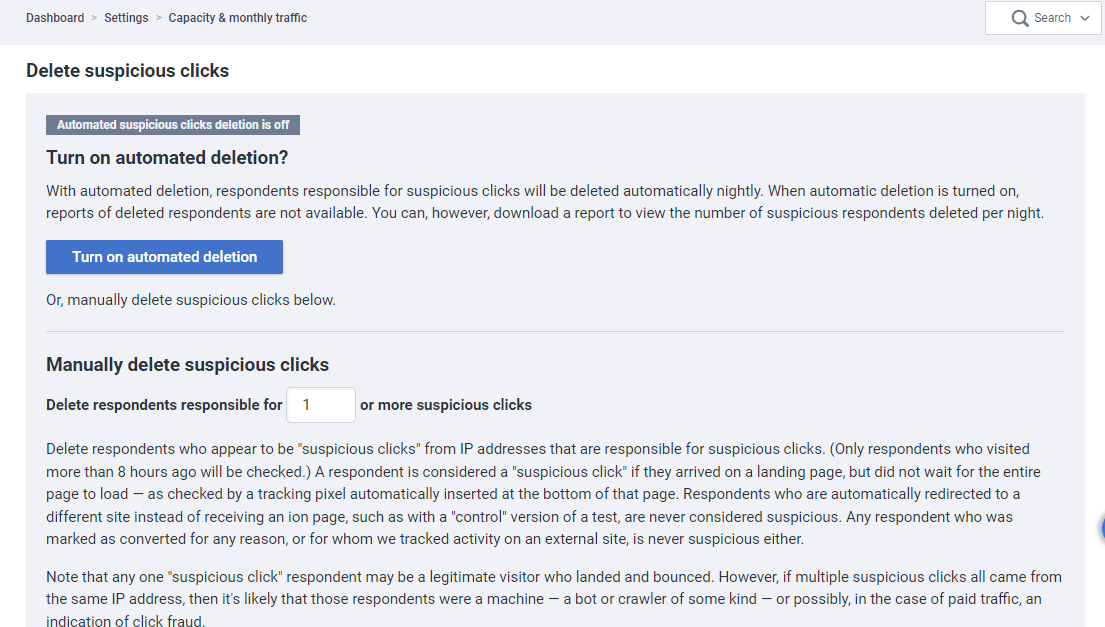
- At the bottom of the page, you will see a section labeled "delete suspicious clicks"
- Click the blue button labeled "turn on automated deletion" to have the Ion console automatically delete suspicious clicks every night
- Define how many pings from a given IP you would like to use as your suspicious clicks threshold to delete any instance of a suspicious IP that has pinged your pages more than that many times (i.e. a value of 1 would remove all suspicious clicks while a value of 5 would only remove Respondents that have pinged your pages 5 or more times)
- When automatic deletion is turned on, reports of respondents that will be deleted are not available. You can, however, download a report to view the number of suspicious respondents deleted per night.
2. Delete suspicious clicks manually
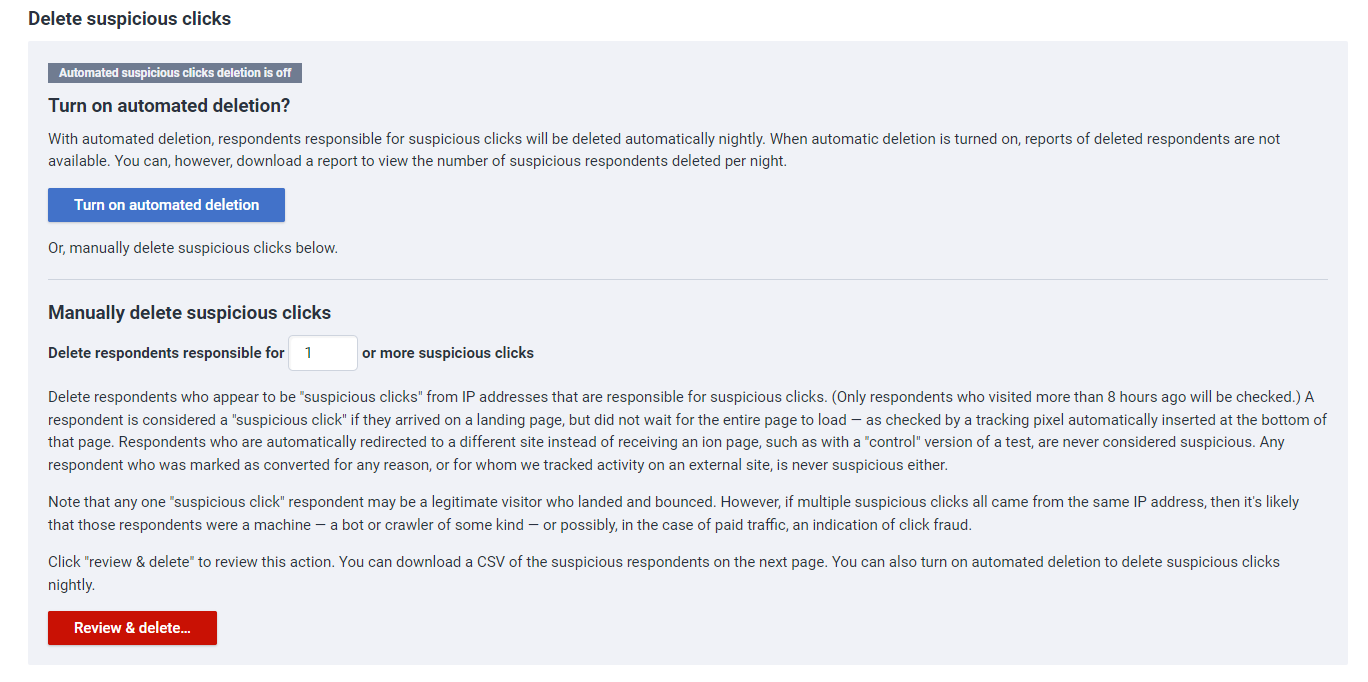
- Below the automatic option, you will see a manual option to delete suspicious clicks
- Define how many pings from a given IP you would like to use as your suspicious clicks threshold to delete any instance of a suspicious IP that has pinged your pages more than that many times (i.e. a value of 1 would remove all suspicious clicks while a value of 5 would only remove IPs that have pinged your pages 5 or more times)
- Click the red delete button to go to a confirmation page displaying how many respondents are about to be removed and will also give you an option to generate a CSV file which can be downloaded for your records
- Simply click “confirm delete” to remove these respondents from your console
3. Delete respondent by Guest ID, Domain or IP
- Open your suspicious clicks report (see the section below for steps on downloading Suspicious Clicks report)
- Sort the Guest ID column to show unique records only
- Highlight the Guest ID column and copy all Guest IDs
- Access /Admin/Settings/CapacityAndTraffic
- Paste into the Guest ID or IP address(es) section in your “Capacity & monthly traffic” screen
- Click delete
- Optionally generate a CSV report by clickingthe orange link to download a file containing the Guest IDs you are about to delete
- Confirm delete
Suspicious clicks report
One additional tool to identifying suspicious click data from your console is the suspicious clicks report. You can manually run a suspicious clicks report each month or automate the report and have it sent directly to your inbox on a regular basis. This report will display relevant data that can be used to delete these clicks from your console.
To run this report:
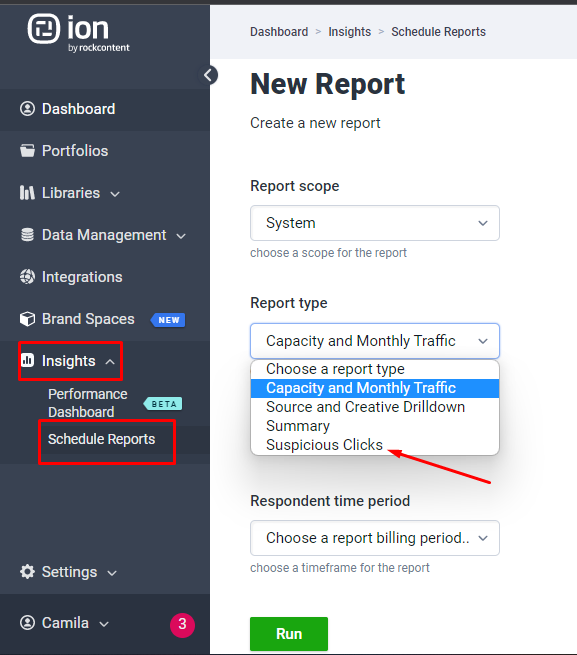
- Go to Insights > Schedule reports
- Click on “New report” button
- Select “Suspicious Clicks” from the Report type dropdown menu
- Select a time period from the available dropdown menu
- Click the green Run button
- Optional: To download the report as an Excel file, simply click the green “Run report” button toward the top of the page that displays your suspicious clicks
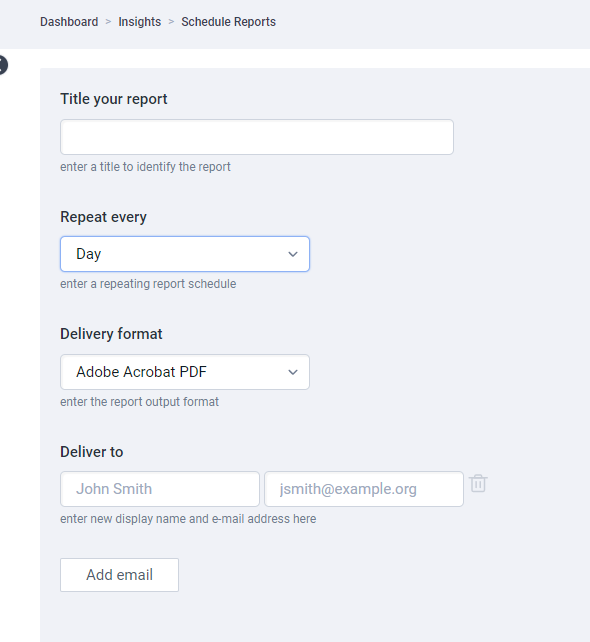
- Automate report
- In the bottom half of the “new report” screen, you will see options to save and deliver this report
- Enter a title, specify how often you would like this report delivered (using the “Repeat every” dropdown menu)
- Enter your name and email address
- Click save
Setting up restrictions for a Guest ID or IP
Once the suspicious clicks have been identified through your suspicious clicks report, you can set up IP restrictions to ensure these specific IP addresses are automatically removed from your console. To set up a restriction, please follow the below steps:
- Click on Settings and go to Admin/Settings/Restrictions
- Click on the “New restriction” button
- Enter one of the Guest ID or IP addresses you want to restrict
- Select one of the following options from the “Restriction” dropdown menu
- Allow but auto-delete tracking hourly
- Allows the IP address to visit your creatives but would automatically remove its respondent data within the hour
- Allow as crawler/bot
- Allows the IP address to crawl your pages without adding to your capacity
- Note: This IP address would not be able to “click” any of the links or trigger any advanced rules in yoru creative
- Allows the IP address to crawl your pages without adding to your capacity
- Block with a 403 (Forbidden) response
- Block with a 404 (Not Found) response
- Allow but auto-delete tracking hourly
