.png?height=120&name=rockcontent-branco%20(1).png)
If you’d like to embed HubSpot forms into your ion experiences, check out this post to easily repurpose your HubSpot embed code into a reusable ion widget. Taking these steps will enable you to redirect respondents to an ion page after form submission and to add ion rule logic to your HubSpot forms.
Before we begin
Before setting up a HubSpot form widget in ion, you will want to understand where to find your HubSpot portal ID and the form ID of the HubSpot form(s) you want to add to your ion pages.
Your HubSpot portal ID is a numeric value that is always present in the URL of every page within your HubSpot account. For example, when reviewing contacts in your HubSpot account, your URL should look something like the below. In this example, we’ve made the portal ID bold to make it easy to identify the portal ID.
https://app.hubspot.com/contacts/123456/contacts
You’ll also need to understand where to find your form IDs. The form ID is a longer alpha-numeric string that you will see in the URL when editing your HubSpot form or viewing form performance in HubSpot. Please find examples below of URLs you will see in your address bar when editing a HubSpot form or viewing performance with the form ID bold.
Edit Form:
https://app.hubspot.com/forms/123456/editor/a1bbbcd2-345b-1234-1234-1a23b456c789/edit/form
Form Performance:
https://app.hubspot.com/forms/123456/a1bbbcd2-345b-1234-1234-1a23b456c789/performance
Let’s get started
Now that you know where to find your HubSpot portal ID and form ID values, we can start working on the form widget in ion. You can put your portal ID and form ID values to the side for now until it’s time to add your HubSpot form widget to a page.
Add widget code to your ion library
The first step in ion is to add the below code to your ion Widget Library.
In ion, navigate to Libraries > Widgets and click the New widget button to add a new widget. We recommend labeling the widget something like Embed Form and storing it in a category called HubSpot.
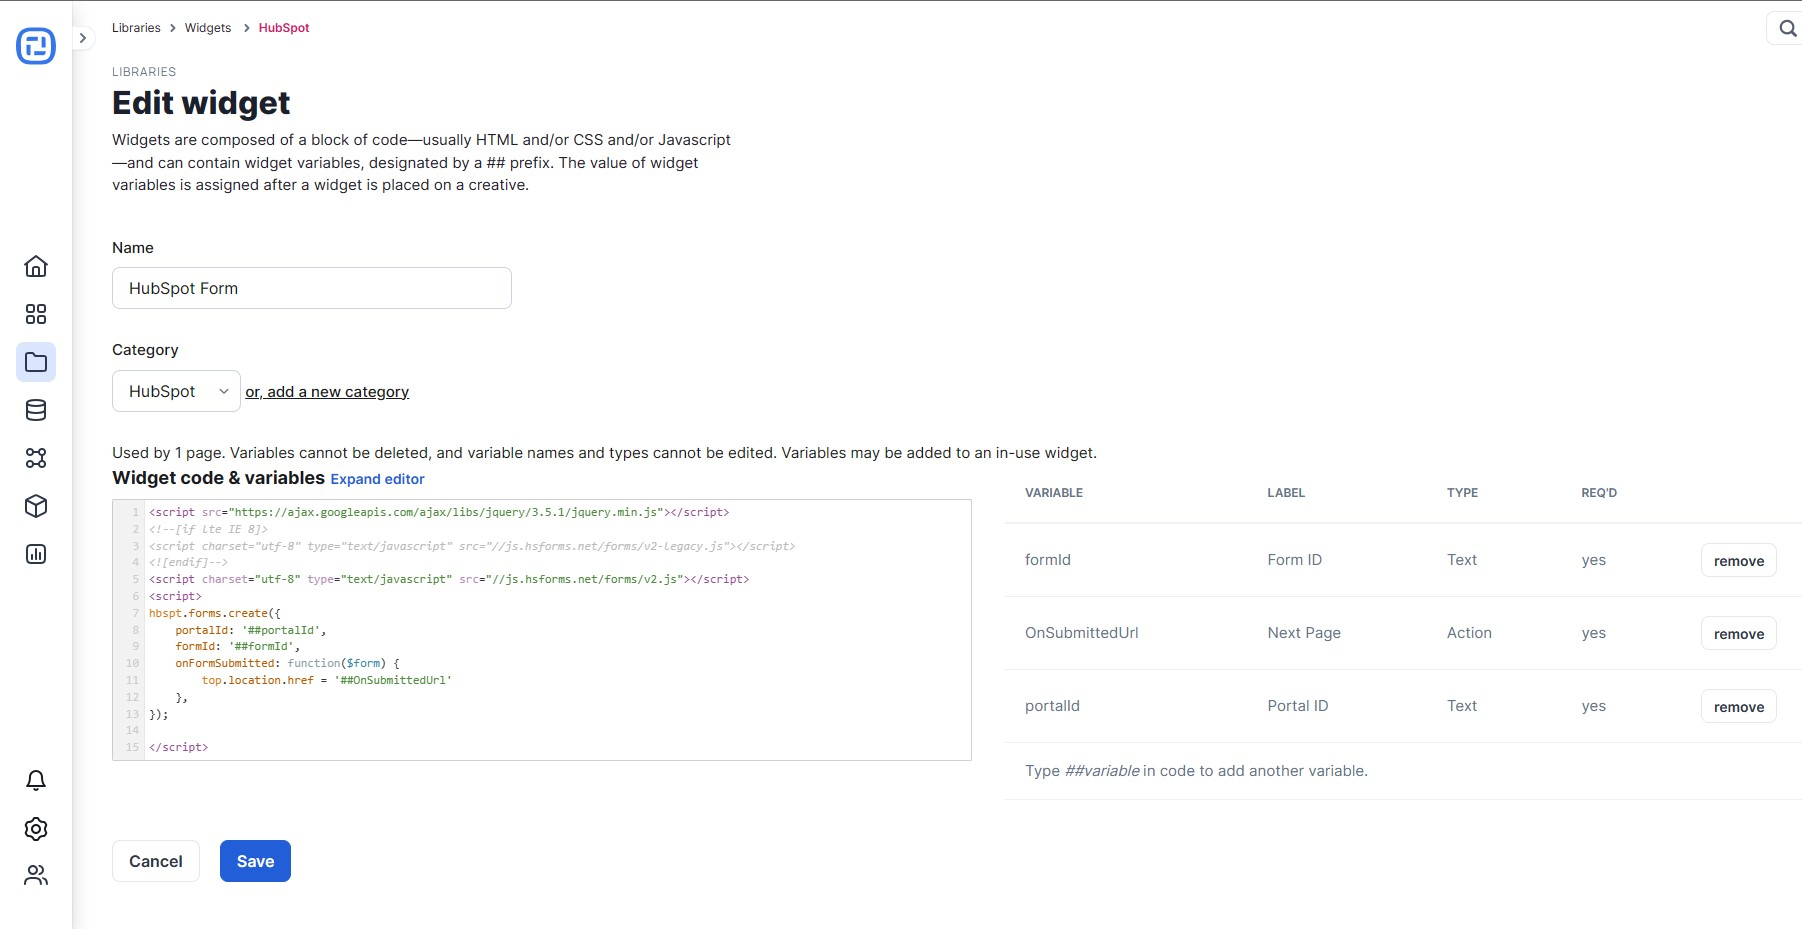
Next, paste the widget code below into the editor.
<script src="https://ajax.googleapis.com/ajax/libs/jquery/3.5.1/jquery.min.js"></script>
<!--[if lte IE 8]>
<script charset="utf-8" type="text/javascript" src="//js.hsforms.net/forms/v2-legacy.js"></script>
<![endif]-->
<script charset="utf-8" type="text/javascript" src="//js.hsforms.net/forms/v2.js"></script>
<script>
hbspt.forms.create({
portalId: '##portalId',
formId: '##formId',
  onFormSubmitted: function($form) {
top.location.href = '##OnSubmittedUrl'
},
});
</script>
This code includes variables that you will be able to populate with your portal ID and form ID when the time comes to add it to your page. It also includes a variable that will allow you to specify what page to go to when the form is submitted.
Before saving, go ahead and set the Portal ID and Form ID as required text and Next Page as a required action, like the example below:
Add the widget to your ion experience
Navigate to the page where you'd like to embed the HubSpot form. Drag the Widget icon from the Basics palette onto your page and select your new HubSpot > Embed Form widget. Next, under Variables in Creative studio, enter the portal ID and form ID, in the Source text option, from your HubSpot account and select the ion page you seek to redirect to.
Voila! Your HubSpot form is now embedded in your ion experience! You can even add ion rule logic to your HubSpot form.