.png?height=120&name=rockcontent-branco%20(1).png)
Through the integration of iClips with your city hall web service, you can generate service invoices directly through the system, from financial entries.
The first step is to check if your city offers this integration.
Then, you need to verify that your agency has the A1 certificate. It is essential for issuing invoices via iClips.
With this information in hand, go to Settings > Agencies. Edit your agency's registration and verify that all data is filled in correctly, such as address and state and municipal registration.
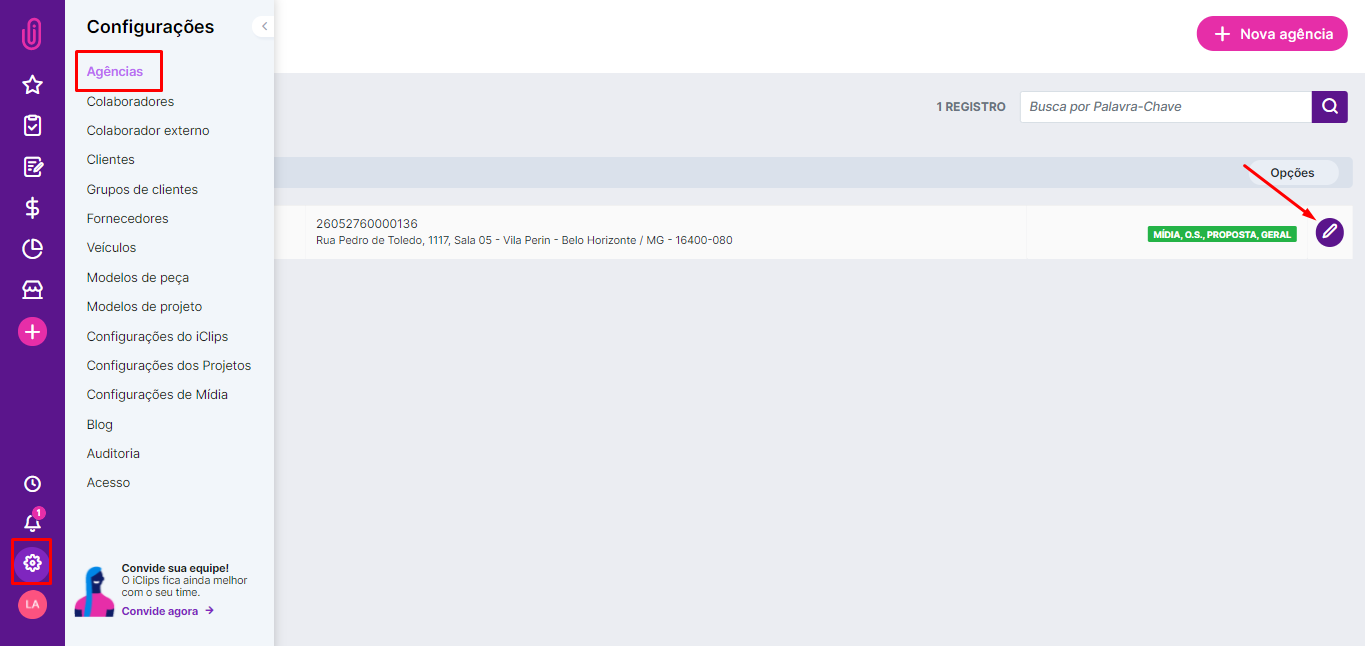
In the tab ‘Invoices and Taxes’, fill in the data according to the information of your company. It is also important to change the operating environment to ‘Production Environment’.
It is also here that you enter your type A1 digital certificate and password and also the tax rates along with their due dates. The ‘Destination’ field is for those you will pay this tax to, which can be the city hall or the federal government, for example.
Important: We recommend that you fill in this information together with your accountant, to avoid errors or tax problems.

After making sure that the system is properly prepared for issuing invoices, go to Finance > NFS-e. The screen will automatically display all the entries available for generating an invoice. But, you can also use the advanced search features and choose which company is the reference to display data.
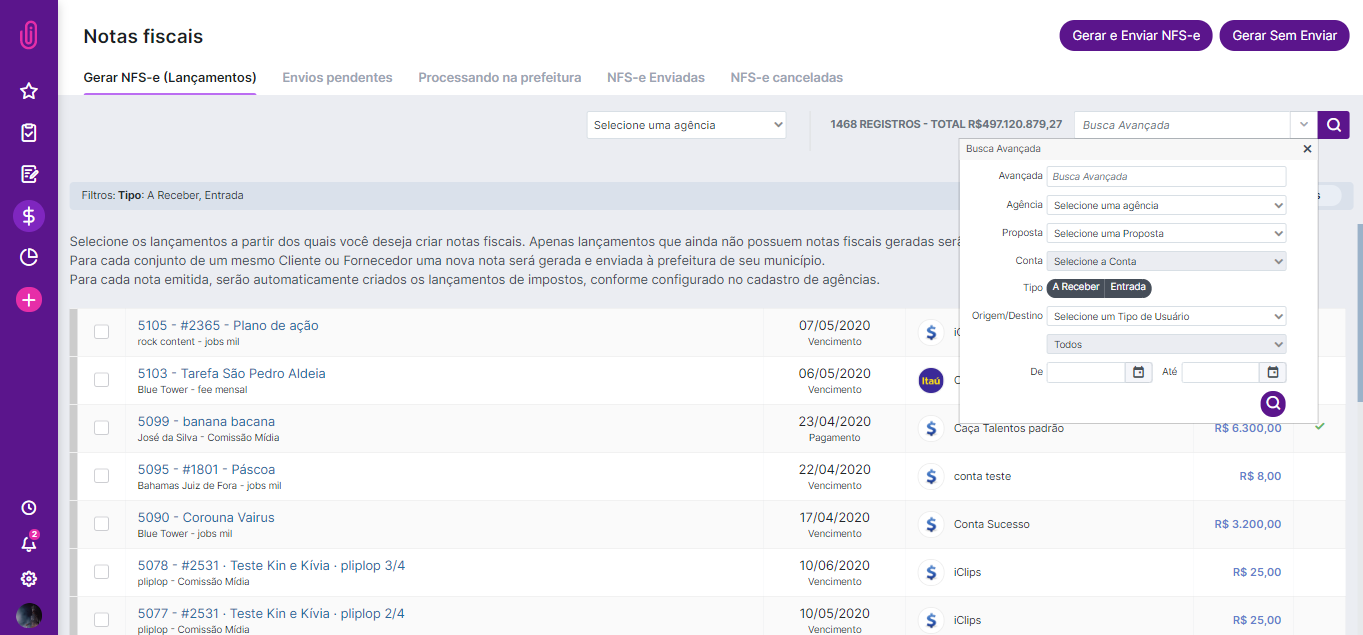
After locating the desired item, use the check box in the column on the right of the screen, then click the button ‘Generate and Send NFS-e’:
A pop-up will open for you to enter the invoice description and other details.
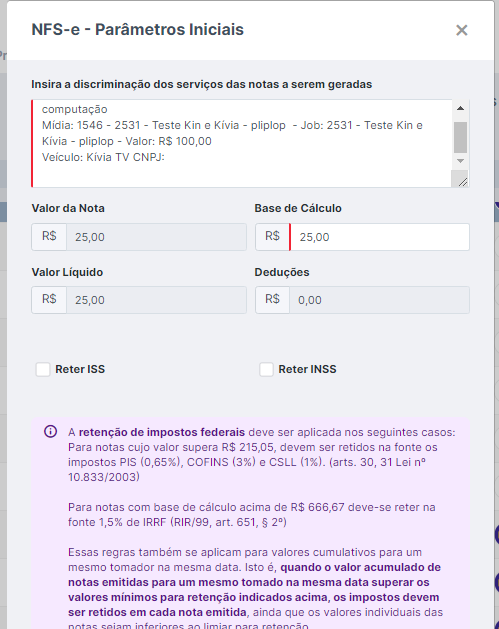
Click on ‘Generate and Send NFS-e’ again to complete the process. Note that the amount and type of tax to be generated for the agency are described at the bottom of the screen.
If an error occurs, a pop-up will be displayed detailing the reason and the invoice will be allocated to the item 'NFS-e Pending'. By clicking on the invoice, in the menu on the right, you will be informed about the error and you can edit the invoice and correct it.
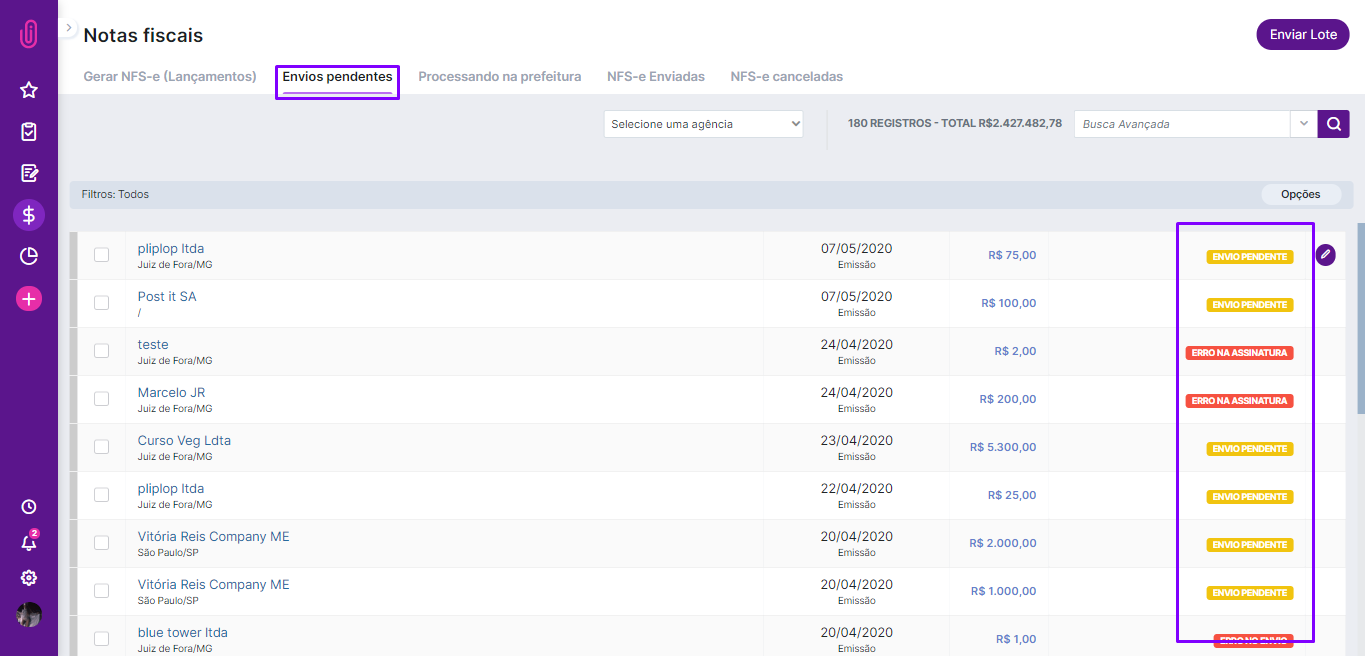
IMPORTANT: The same process can be done, but postponing the batch shipment. To do this, just use the Button ‘Generate without Sending’:

In that case, a tab will be pending and you can send the batch from there. Just select the item from the check box in the column on the left and then click on ‘Send Batch’.
The navigation features on the left of the screen provide access to the invoices sent and those that are still pending (in cases in which the button 'Generate without Sending' is used, or when an error occurs in the batch).
In some cases, you will need to click on the green icon to verify that the invoice has been processed at the city hall. This process is due to the verification time required in the communication between the city hall's web service and iClips.
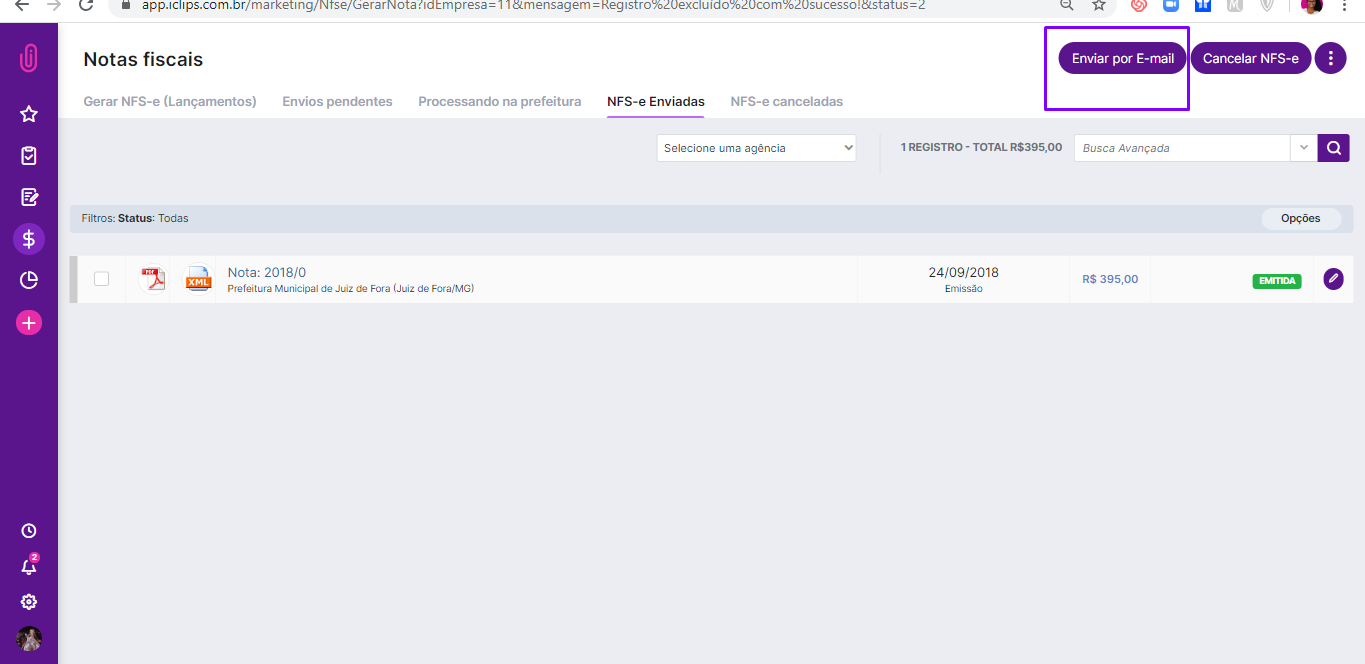
After that, invoices will be in the ‘Sent’ tab and you can send them to your customer by clicking on the checkbox of the invoice and then on ‘Send by E-mail’.
How do I know that the invoices were actually issued?
After all the process described above, you can click on “NFS-e Sent” and view all the invoices that have already been sent by iClips.
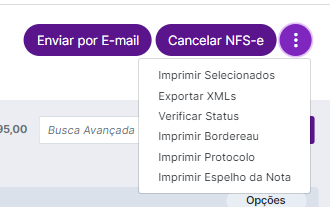
If necessary, you can also cancel an invoice and in this menu, you have the following options:
Still need help? Just call us at help@rockcontent.com or on the platform chat and we will help you out!