.png?height=120&name=rockcontent-branco%20(1).png)
In this article, we will see how tasks opened by the client services manager reach the team's schedule in a simple and fast way.
Opening a project can be considered the most important step within Studio. It is through its opening that other demands from different teams are started. Therefore, its correct filling is even more necessary.
How to start a project correctly?
As we already mentioned above, creating a project correctly is vital for the task progress within the company.
If you still don't know how to open a project, click here.
Project status
For the demand to be forwarded to your team, the project status must be: Approved, Risk or Bidding.
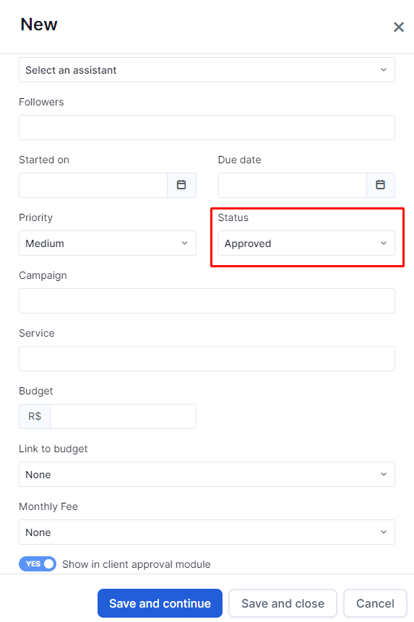
Remember that projects opened by the client via the client's communication module arrive at the company's Studio with a "Requested by the client" status and need to be "Approved" so that the demands reach the rest of the team.
Understand what each status means:
- Approved: the customer has already approved the project.
- Risk: this status is used when a project is created by you, without the customer's request. Thus, the project may or may not be approved.
- Bidding: this status is used when the project is a bid in which the company is participating and needs to produce demands before the result of the selection process.
Other statuses can also be used. However, your demand will be "retained" by the client services team.
An example is the "Stand by" status. It could be used when the client services manager does not yet have all the necessary information to complete the opening of the project but desires to enter it gradually. When everything is filled, they only need to change the status to "Approved", "Risk" or "Bidding".
It is worth mentioning that to fill in the other items of the project such as creative brief, tasks, and assets, you must save your project first.
Task status
In the same way as the project, the task also needs to be correctly filled in: it has the Social Media checkboxes and permission to be displayed in Budget and Media activated.
You can set that on the Tasks Management page:
Or in the tasks tab inside the project. Here, you will need to set the task status and check the social media boxes:
Each checkbox indicates which path that task will take through the system. Below is a summary of each option:
- Social media: this option shows a preview related to each social network (Facebook, Instagram, Twitter, Linkedin, and others), as well as allows the creation of separate texts for each social media, for example.
- Media: tasks with this checkbox activated indicate if it has any media actions linked to it (media planning or media map—IOs)
- Budget: this status will indicate that the task will have a quote linked to it. In order for the production team to be able to associate a budget in the future, this checkbox cannot be missed.
When selecting the tasks to be developed, it is also necessary that their status correctly filled. There are 5 options for the task status:
- Requested by client: tasks that came from the communication module with the customer and were requested by them.
- Canceled: tasks that were canceled during the process (this status does not send demands to the team).
- In progress: tasks that can already be performed by the team.
- Completed: tasks with this status have typically gone through their entire workflow and have been completed. If this status is set manually, the task will not be forwarded to creation.
- Stand by: tasks that are paused for some reason. This status does not send demands for creation.
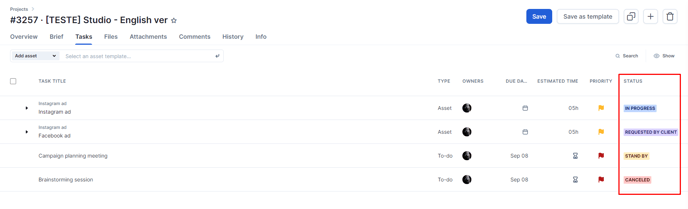
Each status has a tag for easy viewing, as shown above.
Still need help? Simply reach us at help@rockcontent.com or through the platform chat and we will help you!