.png?height=120&name=rockcontent-branco%20(1).png)
Once you have proofed and previewed your Creative to make final preparations to go live, you will be ready to add a URL to your Creative. Below, please find the steps to create a URL and publish it.
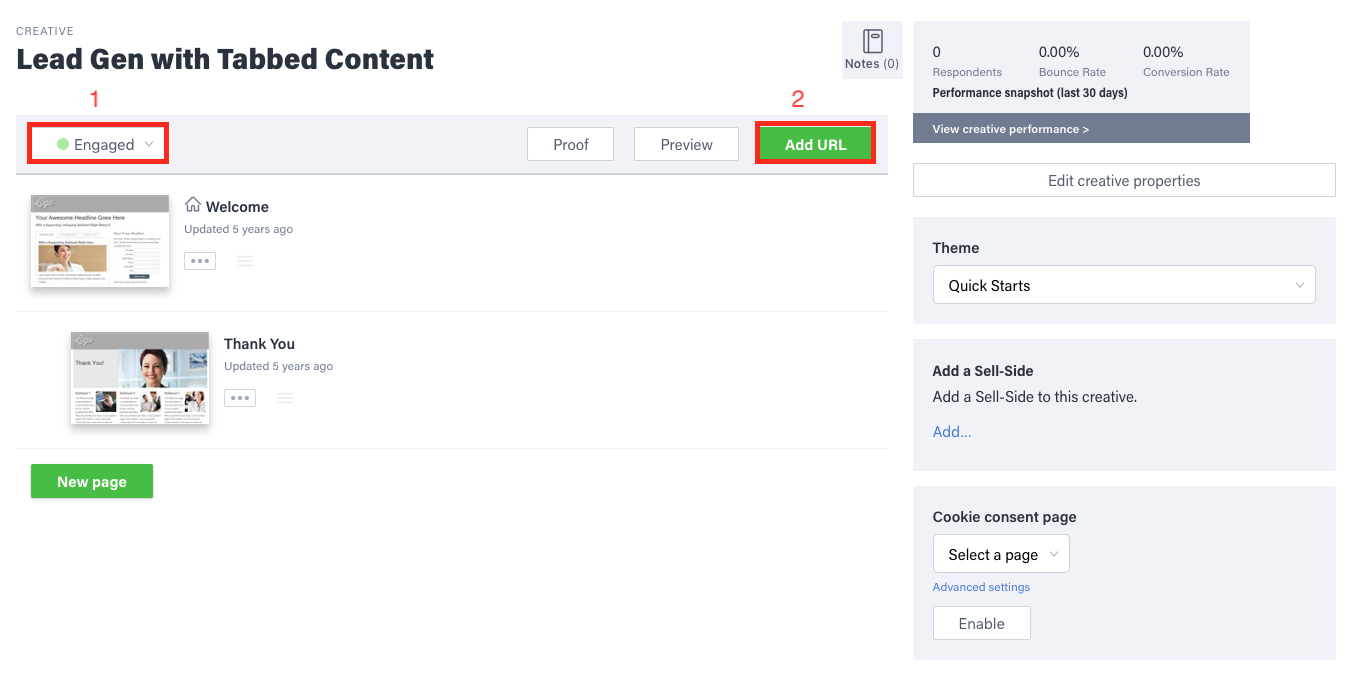
1. From the Creative Management Screen, click the status Dropdown menu and select “Engaged”
2. Click the green Add URL button
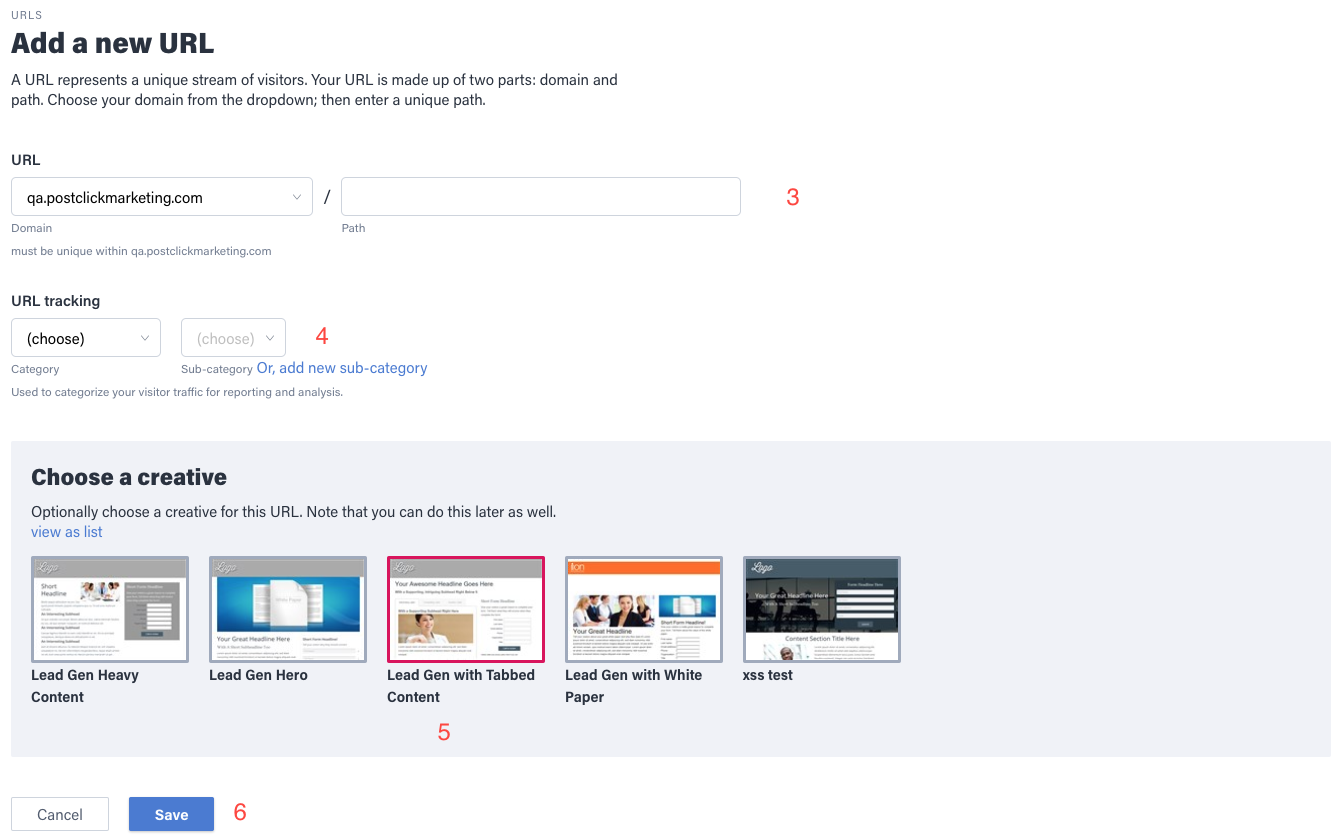
3. Select the desired subdomain from the domain Dropdown menu and enter a path extension that will be used to the right of the slash within the URL
4. Select the category and sub-category for how you would like to track visitors to this URL
*NOTE: This selection will feed respondent metrics into the “Media Summary Gauge” within your Performance tabs and will not affect how traffic flows to your URL or technically where the URL can be used but rather is meant for Ion reporting and organizational purposes.
5. Click the Creative you would like to associate with this URL
6. Save
You’re Live!
After clicking Save, your traffic source URL will be live and you will be able to start sending traffic to your URL as soon as you are ready.
URL Management Screen
The URL Management Screen includes several options and pieces of information in regards to your URL.
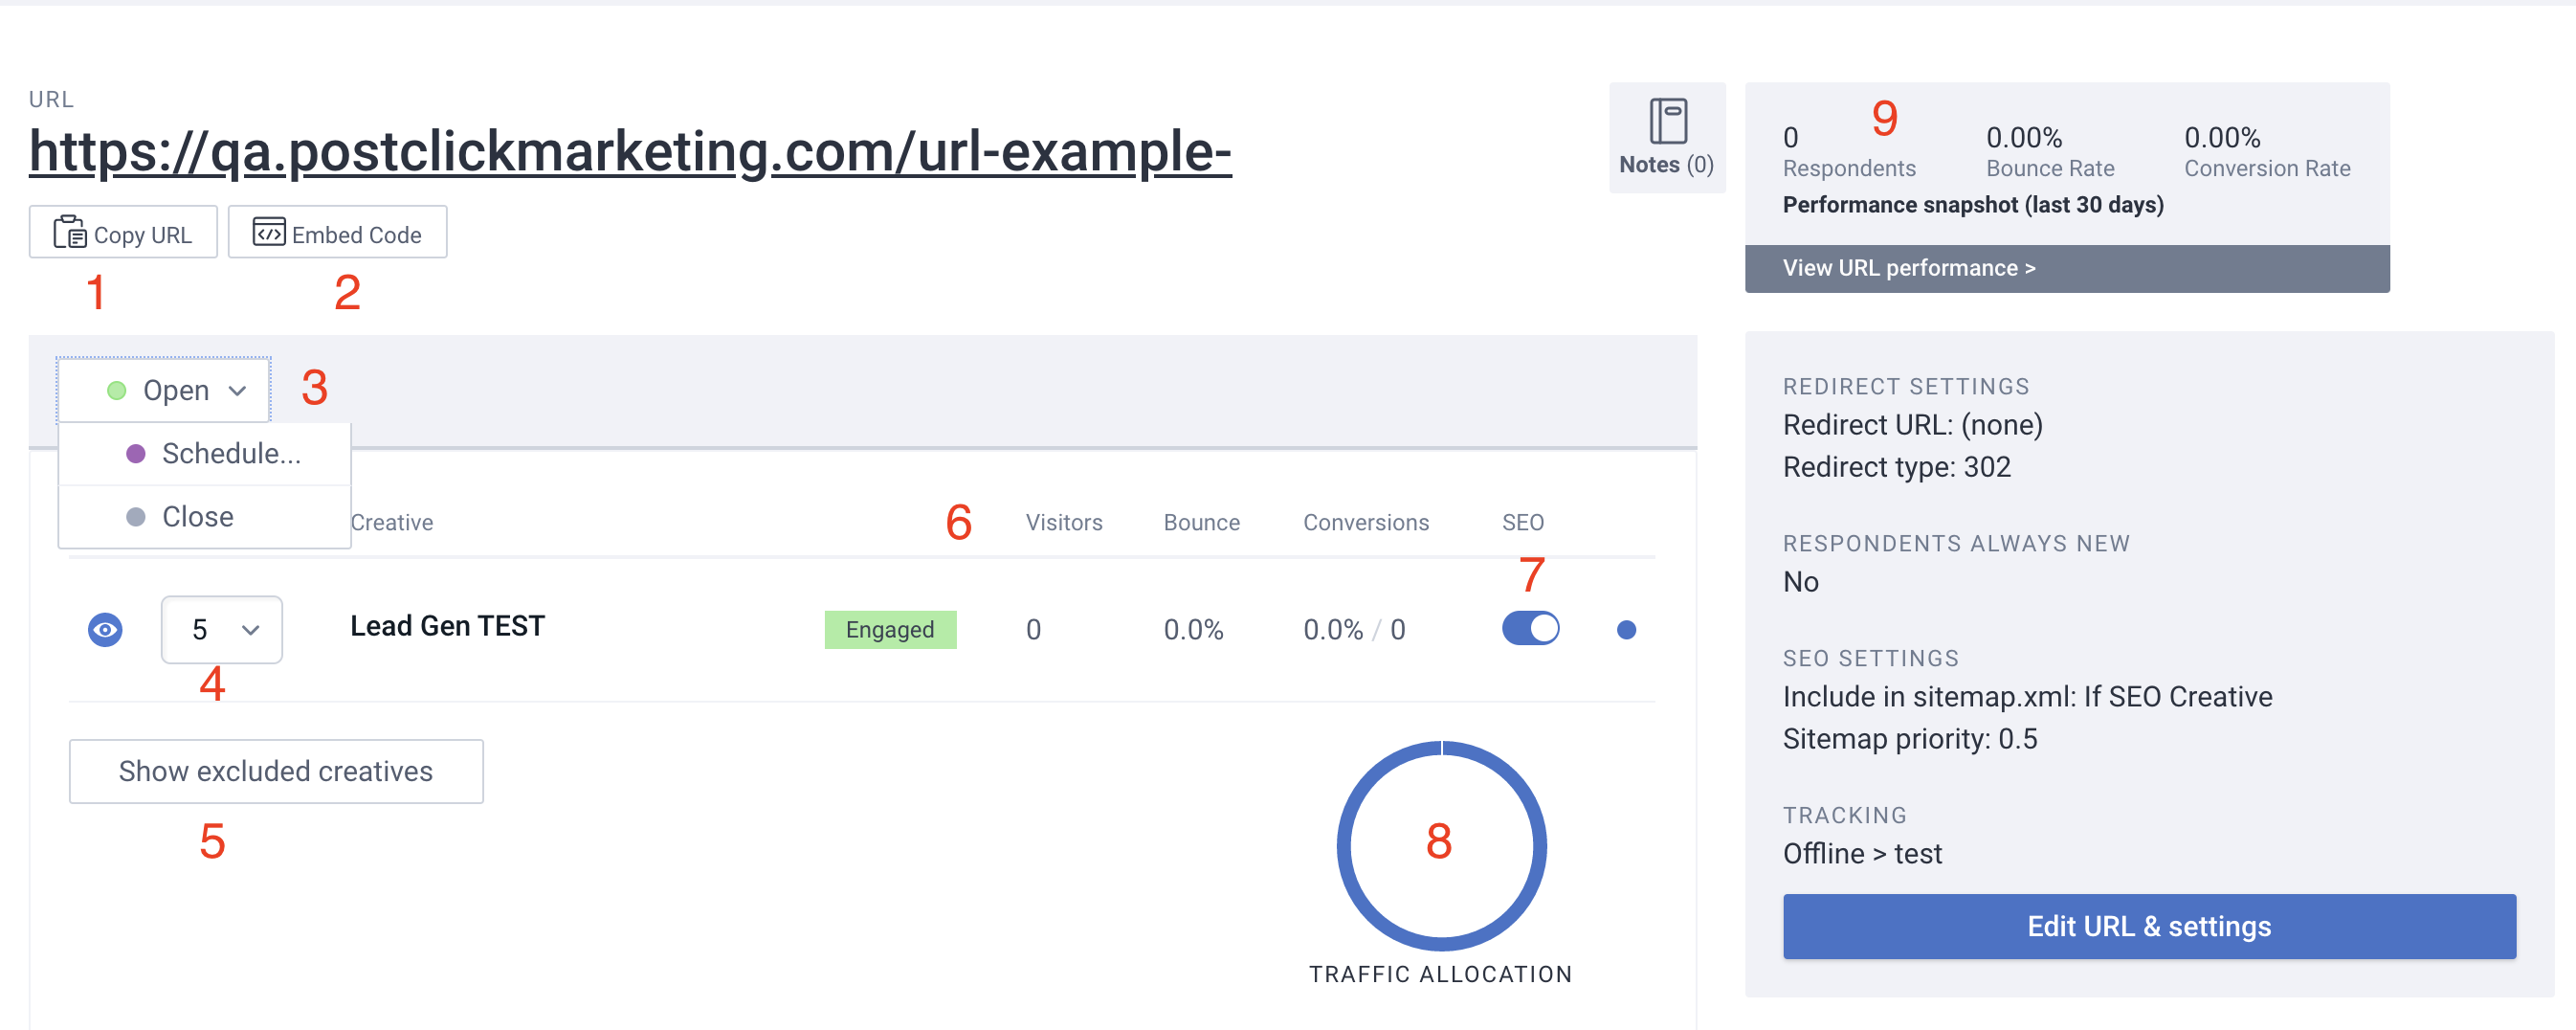
1. Copy URL
You may click this button to copy the URL to your computer’s clipboard.
2. Embed Code
You may click this button to open a window with embed code selected for you to copy and paste into an external site. For more on third party embedding, please check this.
3. Status
This button can be clicked to open or close the URL. A schedule option is also available to schedule when the URL will open and/or close.
4. Traffic Allocation Dropdown
Can be used to specify how much of the total traffic should be sent to a given Creative within the Campaign. When only one Creative is set to receive traffic, 100% of traffic will go to that Creative. To set up a split test, choose a number greater than 0 for two or more engaged Creatives within the Campaign. Traffic allocation is weighted so if two or more Creatives use the same number, traffic will be split evenly.
5. Show Excluded Creatives
Shows all engaged Creatives within the Campaign.
6. Performance Snapshot - Creatives
Shows the total number of visitors, bounce rate, conversion rate and the total number of conversions for each Creative through this URL over the last 30 days.
7. SEO
If the SEO switch is enabled, that Creative is designated as the “SEO Creative” which will be the one crawled by search engines when a split test is set up for the URL.
8. Traffic Allocation Chart
Pie chart that shows the percentage of traffic set to go to each Creative within the URL.
9. Performance Snapshot - URL
Shows the total number of respondents, the bounce rate and conversion rate for the URL over the last 30 days.
URL Settings
The URL Management Screen includes additional settings that can be adjusted for your URL. To access these settings, click the “Edit URL & settings” button on the right side of the URL Management Screen.
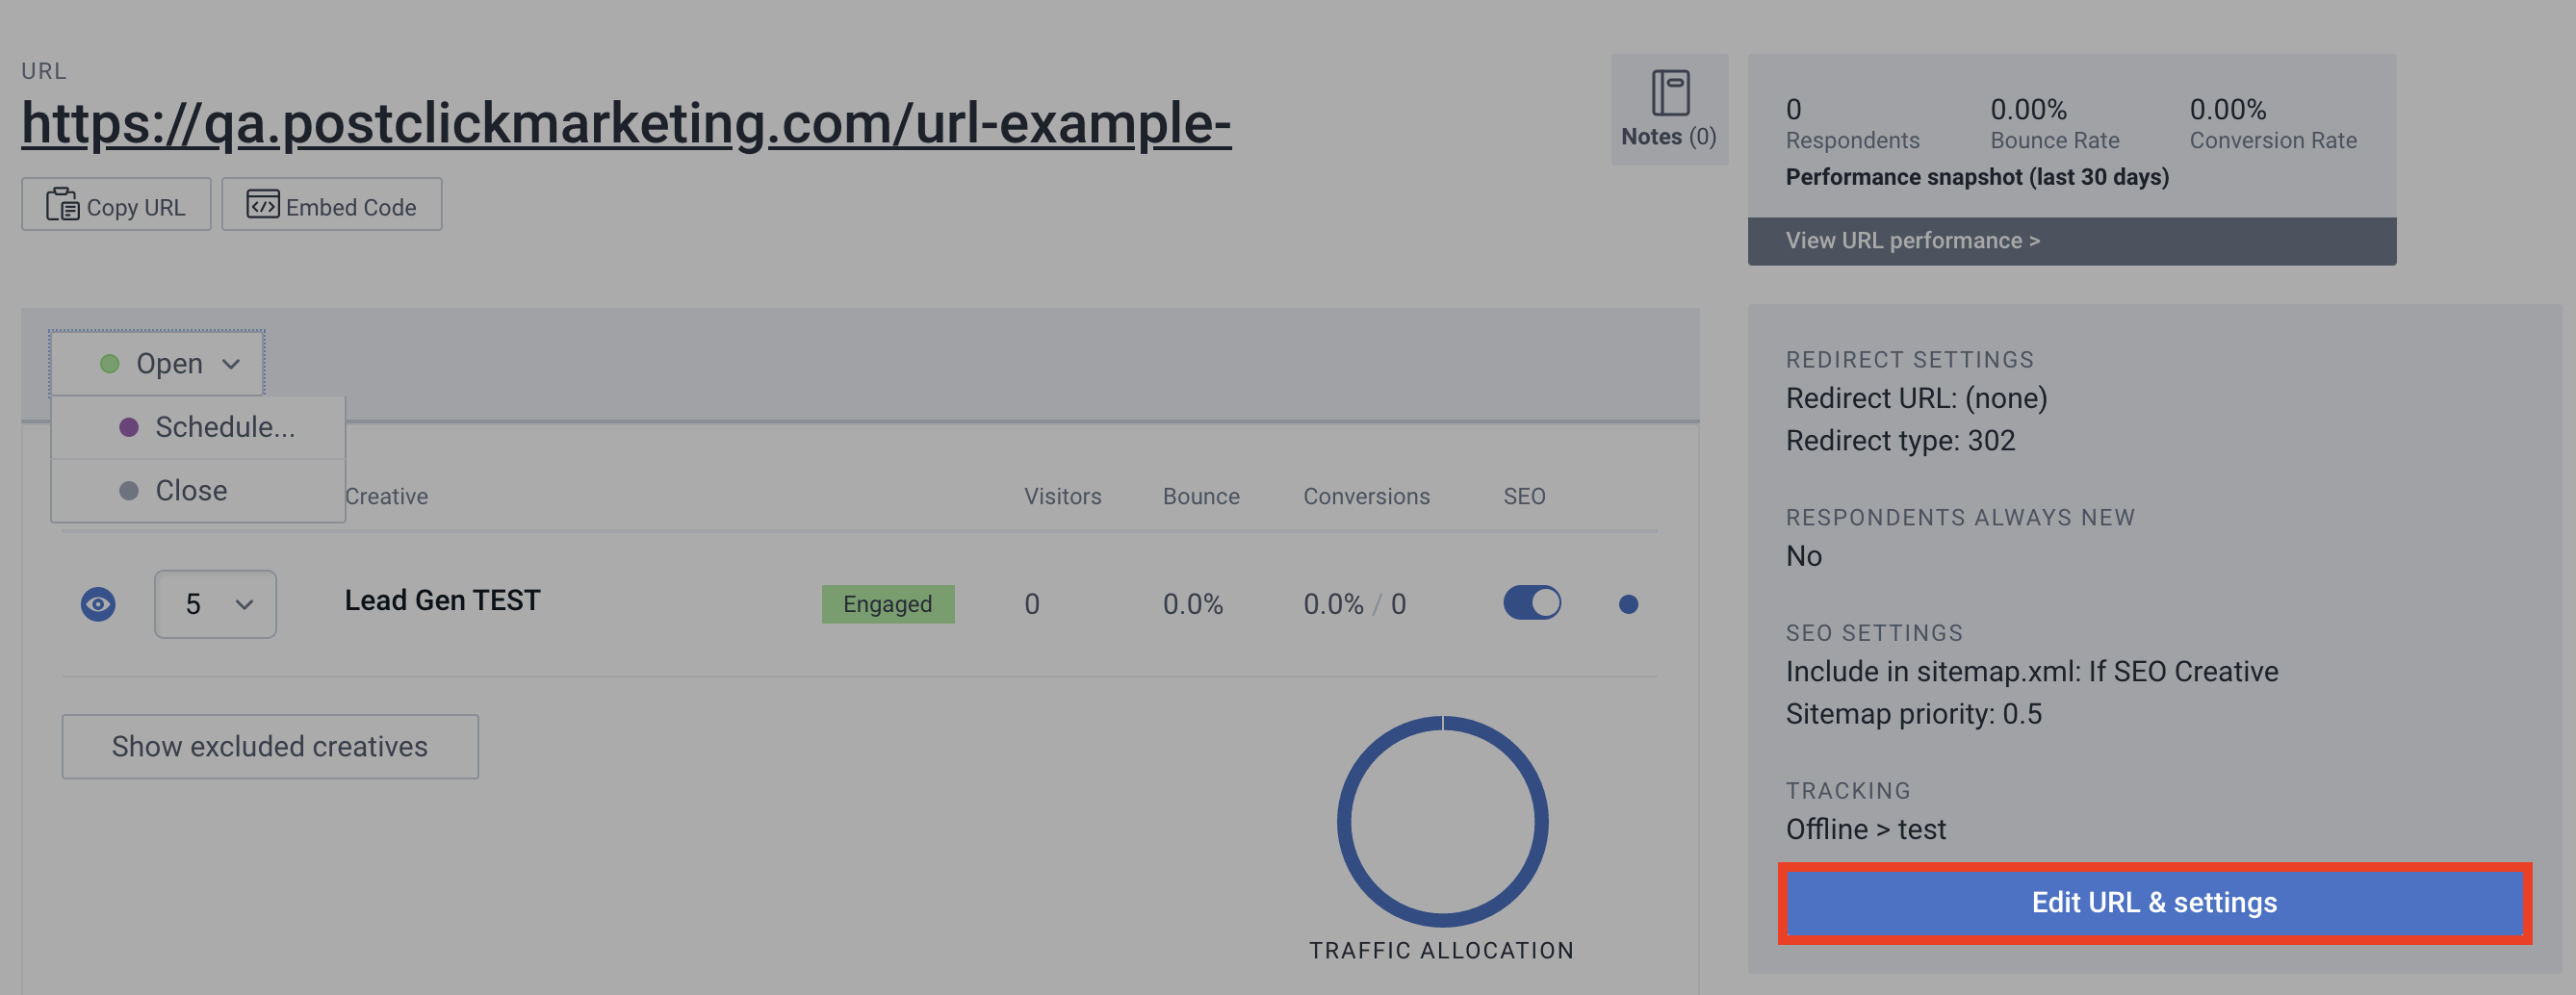
With this window open, you can change the subdomain and/or the path extension for your URL as well as how you are tracking visitors. There are also several advanced settings that you can alter for your URL here.
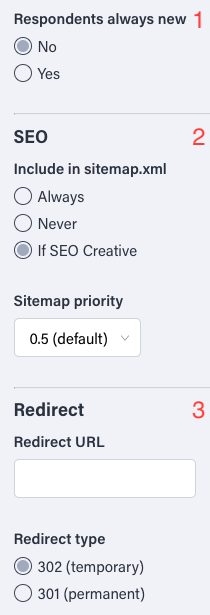
1. Respondents Always New
When enabled, this option will treat return visitors as new, unique visitors. This can be helpful when using an Ion experience at a conference, trade show or other event where many people may use a single device to submit their information. By enabling this feature, each time a visitor goes through the URL, their data will be saved separately from the previous visit.
2. SEO
These options allow you to include or exclude the URL from your subdomain’s sitemap. By default, “If SEO Creative” will be selected which will tell crawlers to crawl the Creative checked as the “SEO Creative” when a split test is set up for the URL.
Excluding the URL from your sitemap will help prevent it from showing up in organic search results. If you do not want the URL to be included in organic search results, you will want to select the “Never” option.
The sitemap priority Dropdown menu allows you to control how high or low the URL appears within your subdomain’s sitemap.
3. Redirect
By default, any visit to a closed URL will be redirected to the Campaign fallback URL. Should you want to redirect to this specific URL elsewhere once the URL has been closed, you can specify a redirect URL here and also set a 302 or 301 redirect type.
*NOTE: The redirect URL will need to start with http:// or https://