Organizing your blog's posts is critical to improve your visitor's experience and your visibility to search engines.
Therefore, labeling them accordingly is the best way to add more value to your blog.
Why use categories?
WordPress categories help organize your blog's posts according to their subjects. That way, your visitors have an easier time finding the content they are interested in and your blog becomes more organized. Great, right?
Another advantage is the fact that, when you use categories well, your blog's search ranking also improves.
After all, it gets easier for your content to be found, indexed, and ranked.
Would you like to organize your blog? Then, let's learn how to add, edit, and remove a category.
How to create a new category
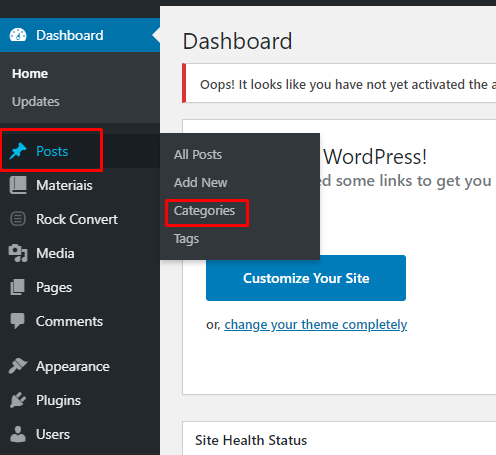
To add a new category, you have to access your WordPress admin panel and select "Posts > Categories".
Then, you can create a new category by filling the form on the left side, starting with the name.
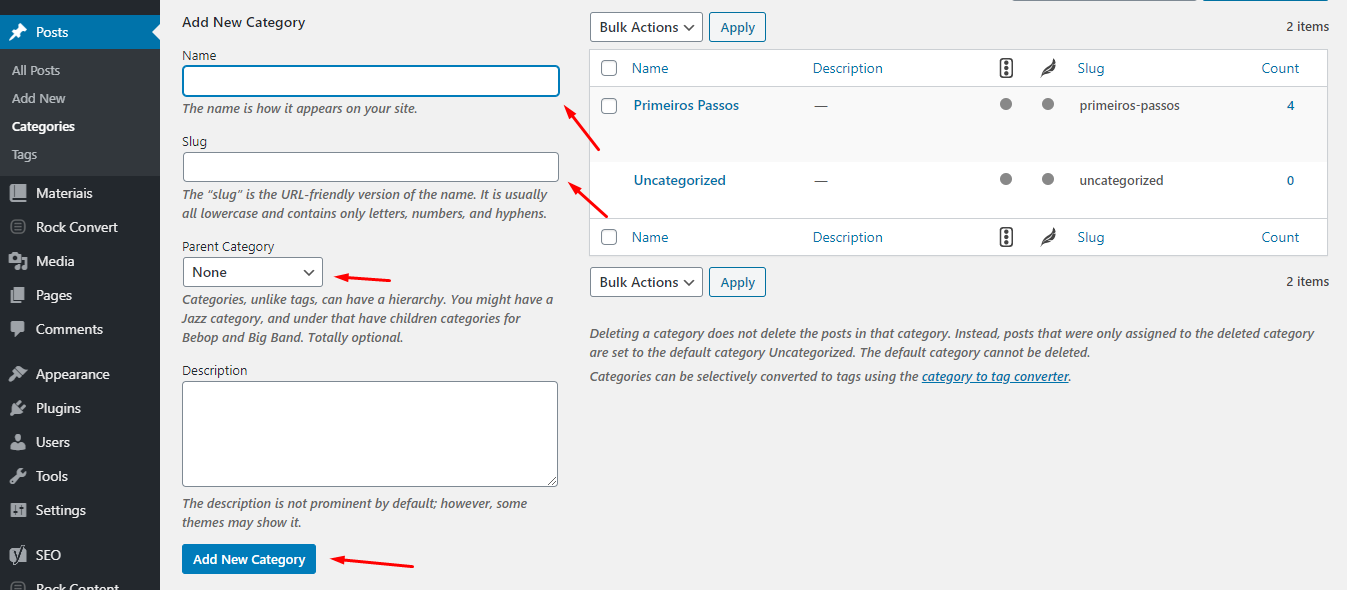
Slug is the name given to how a category shows up in your blog's URL address. For instance, in the image below, first-steps is the category slug, and we are seeing the page that gives us all the articles in the First Steps category.
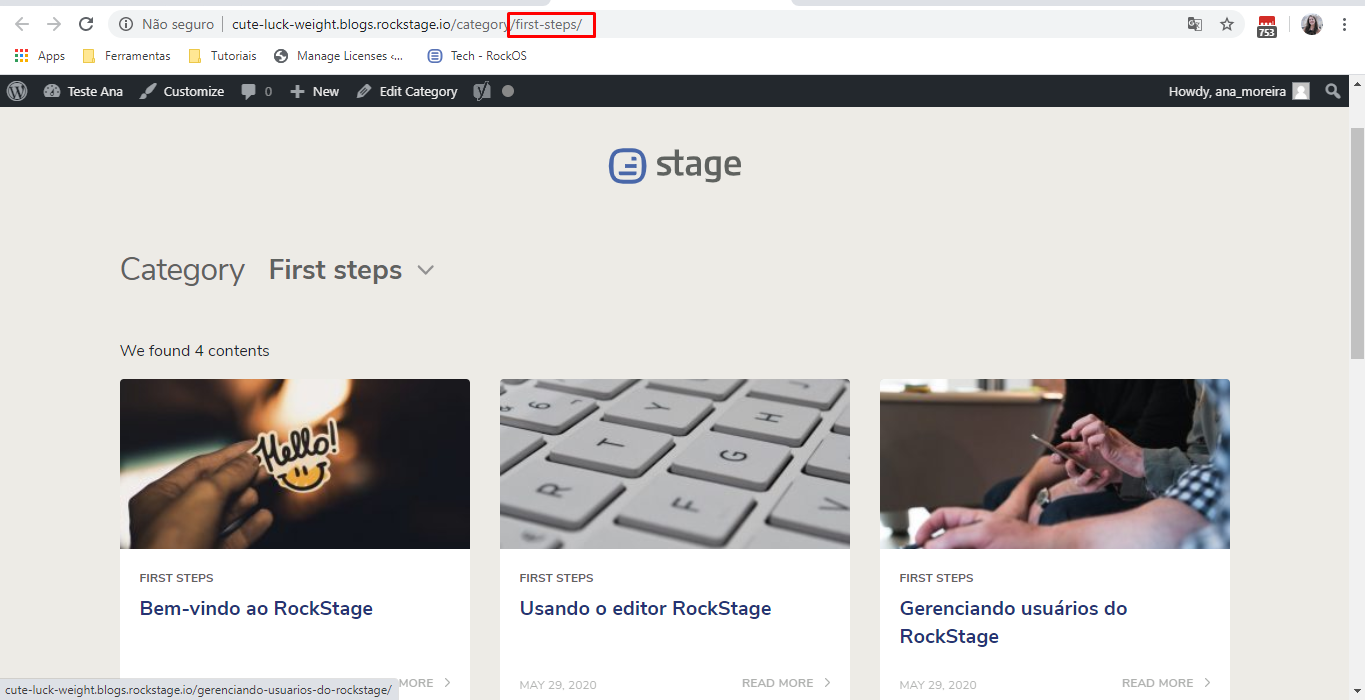
It is important to remember that, if your category has spaces, this is the time to replace them with hyphens. If you leave it blank, WordPress will automatically fill that field with the category name. So, if you wish to have a different slug, just add what you want.
The parent category is an optional field, which you must fill if you are creating a category that is the subcategory to another one. In this case, just pick the 'parent' — which should already exist — of the one you are creating.
And now, simply click on Add new category and you are all done. You now have a new category!
How to edit an existing category
To edit a category, you need to access your WordPress admin panel and select “Posts > Categories”.
On the WordPress category page, find the category you wish to edit, hover the mouse cursor over it and click the "Edit" button or choose "Quick Edit".
The "Edit" button will allow you to change the Name, Slug, Parent category, and category description. The "Quick Edit" button will only allow you to edit the Name and Slug.

Also, it is important to remember that if a category is changed, all the posts linked to it will also be changed.
In other words, say you have a category named School and you change it to Student. All the articles that were previously set to the School category are now under the Student category.
How to delete a category
To delete a category, you have to access your WordPress admin panel and select "Posts > Categories".
After opening the WordPress category page, find the one you wish to remove, hover the mouse cursor over it and click on the "Delete" button.
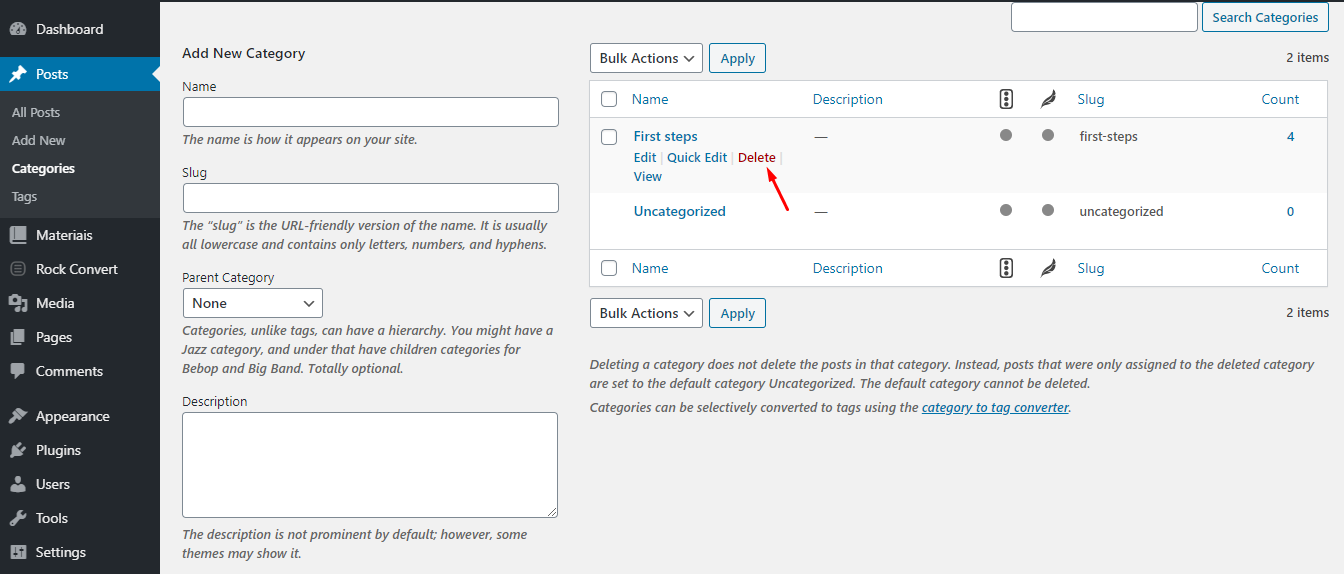
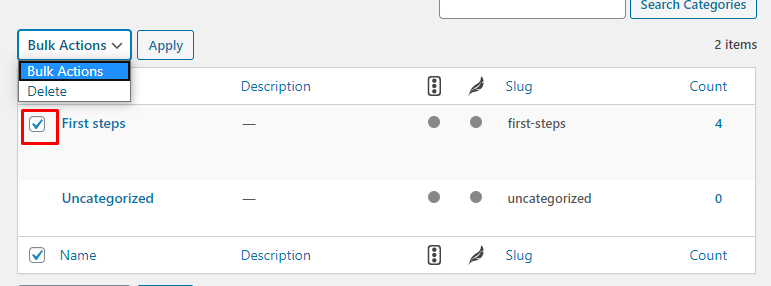
To delete several categories, you can use the checkboxes to the left of the names and then choose "Bulk Actions > Delete > Apply".
.png?height=120&name=rockcontent-branco%20(1).png)