.png?height=120&name=rockcontent-branco%20(1).png)
If you have a blog or a website, you surely have already heard of Google Search Console. This is an important tool for monitoring the SEO performance of your website/blog.
Check out how easy it is to install Google Search Console:
1 – You can search for Google Search Console within Google itself. Then, you will be redirected to this page. Click the blue Start Now button, just like in the image below.

2 – Now, you will need to select your website's properties. To do that, type or paste the full URL of your website/blog in one of those properties (domain or URL prefix) and click on Continue.

3 – Next, on the Verify ownership page, you will have a couple of options. We recommend you go with Google Analytics..
If you are already logged in, just press the Verify button. It will verify and install by using the Google Analytics code.

4 – However, if you do not have Google Analytics, you can choose the HTML Tag verification method.

5 – Google will generate an HTML code. You need to paste it on your website/blog's home page.

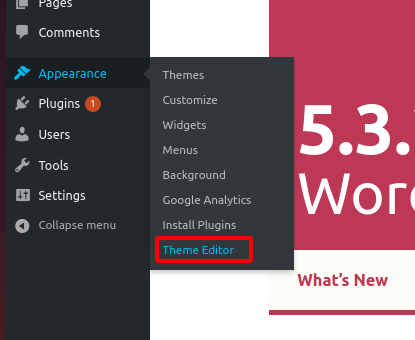
If you are like most people and use WordPress, you can access the HTML of your WordPress home page by going to Appearance > Theme editor.
If you use another platform, you need to find a way to access your home page's HTML code. Either through WordPress or another tool, once you find the HTML code, paste the code Google supplied.
6 – Save the changes — with WordPress, just click on Update file.

7 – You are all done!
If you still have questions, check here how you can get in touch with our support staff,
Also, make sure to access our Complete Guide to Search Console