.png?height=120&name=rockcontent-branco%20(1).png)
If you have a blog on wordpress.com and one day you decide to switch to a hosted wordpress.org you may want to import all the content from one to the other. In this tutorial, I will teach one of the ways in which this can be done.
This tutorial works for any of the following scenarios:
- Hosted WordPress to another Hosted WordPress
- wordpress.com to Hosted WordPress
- Hosted WordPress to wordpress.com
I will call the WordPress blog that we will be exporting blog1. The WordPress blog we will import the content to will be blog2.
The process itself is not difficult, but if you have a lot of content, especially images, on blog1, you will need to be patient because it may take a while for your files to be imported.
Exporting content
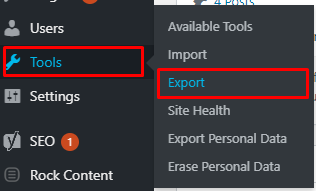
Log in to blog1, go to “Tools/Export” and click “Export”.
On the next page, select the option “All content” or “Posts” to export the content.
Click on “Download Export File” to download the file with the content. Download it and save it to a folder on your computer.
The extension of the export file will be .xml
If the blog has been online for a long time, or contains many images, we recommend that you use the “Posts” option and export the content every 2 months. It takes some work, but it makes exporting/importing you posts way easier in the long term, because most hosts do not allow files larger than 2 MB (you will not be able to import a file larger than that). Also, if you use a lot of images in your posts, it will take a long time to import everything at once.
Importing content
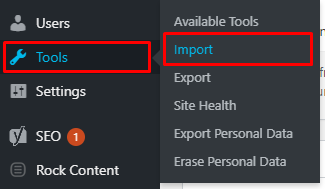
Log in to blog2, go to “Tools/Import” and click on “WordPress“.
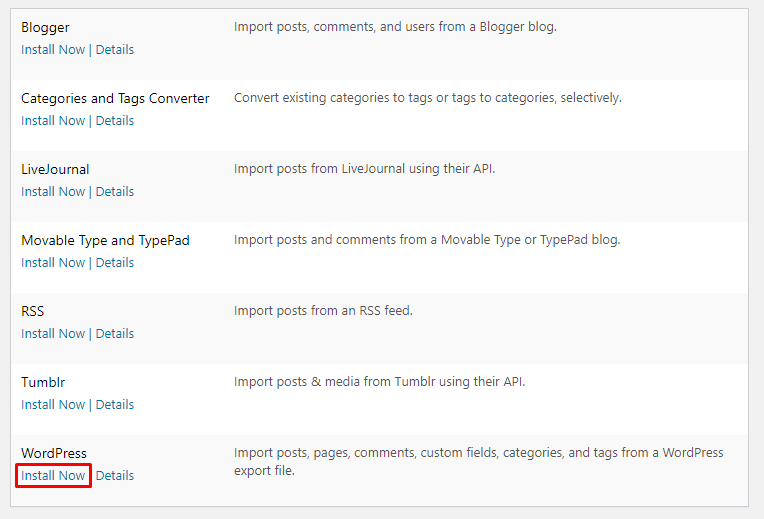
You probably won't have the import plugin, so a notification will pop up suggesting you to install it. You need to install it. Simply click “Install Now” to do so.
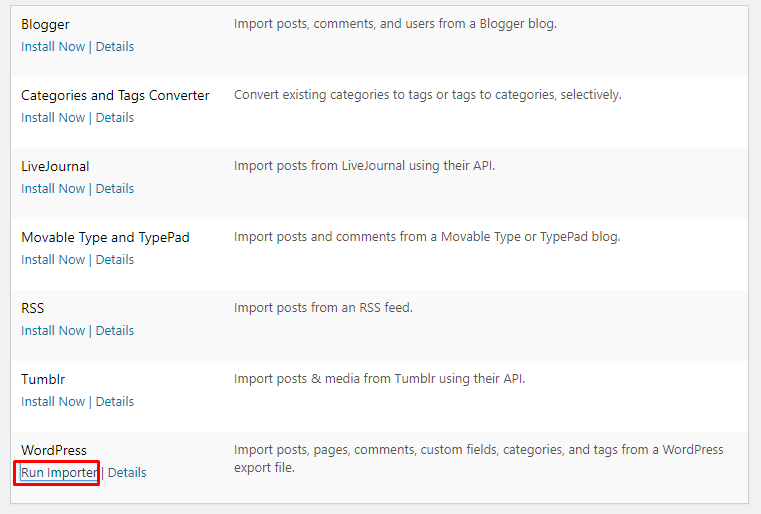
After that, you will need to activate the plugin for it to work.
Just click on “Activate Plugin & Run Importer”.
On the next page, an option to import the file with your posts will appear. This is the file you exported and saved in a folder on your computer a few steps back.
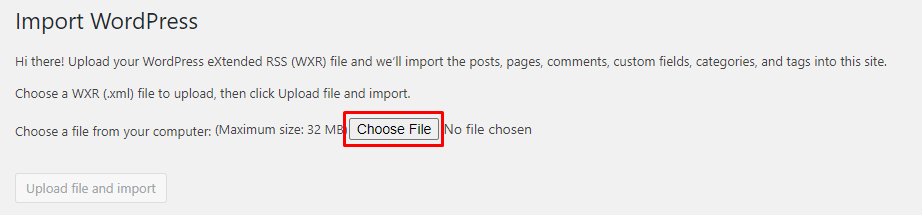
Select the file and then click on “Upload file and import”.
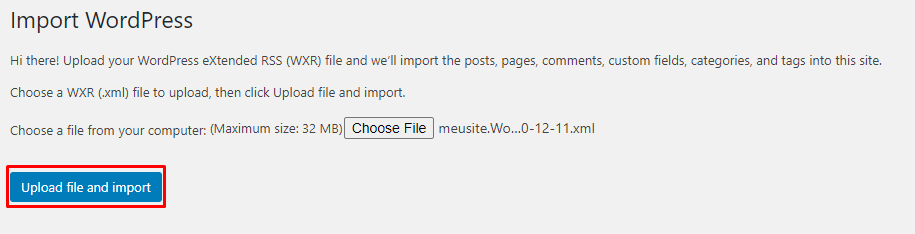
Note that if the file is larger than 2 MB, an error message will be displayed and you will not be able to import it. That’s why I recommend exporting your posts every 2 months, or even monthly, if necessary.
On the next page, you will have the option to create a new user to be the author of all the imported content. You can choose one of the existing users if you prefer.
You can also choose whether to import media files from blog1 to blog2. By selecting this option, all images (and videos and audios, if any) will be imported into the FTP server of blog2. If the files are larger than 2 MB, they will not be imported. The texts will be imported normally, but you will notice that some images will be missing from those posts.
If you do not select the option to import media files, the content will be imported and the images will appear in blog2 posts, but they will still be stored in blog1. That means that if you delete blog1, the images will no longer appear in the imported posts.
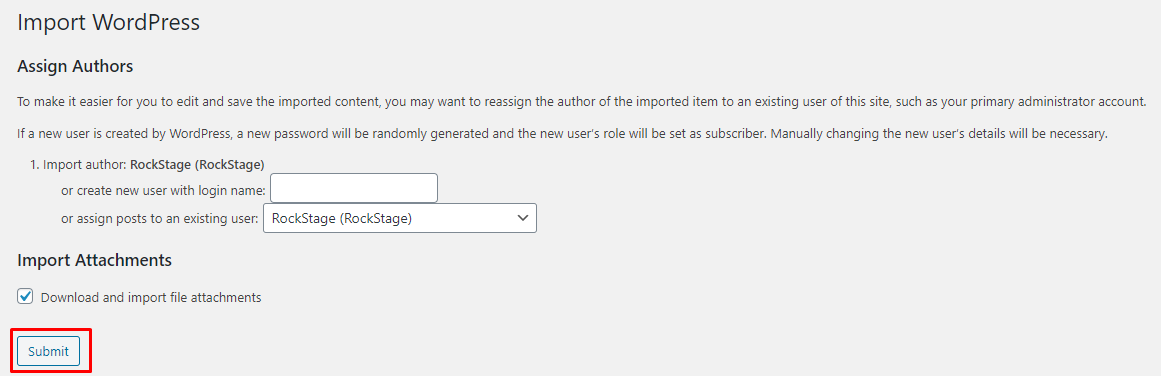
After clicking “Submit” (see the previous image) you need to wait for the content to be imported. This can take some time, depending on the number of texts and media files (if you selected this option) you're importing. This is where the patience that I mentioned at the beginning of this guide comes in.
When the process is over, a success message will be displayed, saying “All done”. Now you can import another file, if you wish, or start using blog2.