.png?height=120&name=rockcontent-branco%20(1).png)
If you would like to show your social media presence to your readers or users, adding your Instagram feed to your blog or website can be quite interesting.
To do that, we will use the “Slider and Carousel Plus Widget for Social Media” plugin.
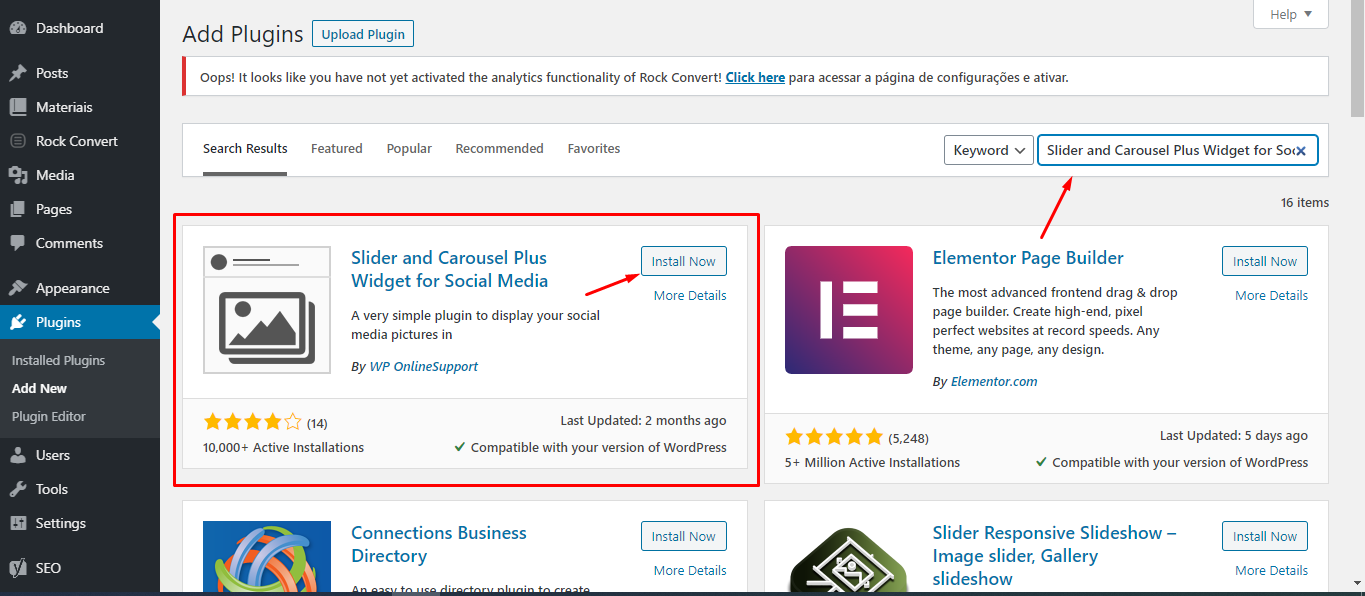
First, access your website or blog's admin panel, find Plugins on the left sidebar and click on Add new.

Search for Slider and Carousel Plus Widget for Social Media and click on Install now on the first result, just like in the image below:
After installing it, press Activate.
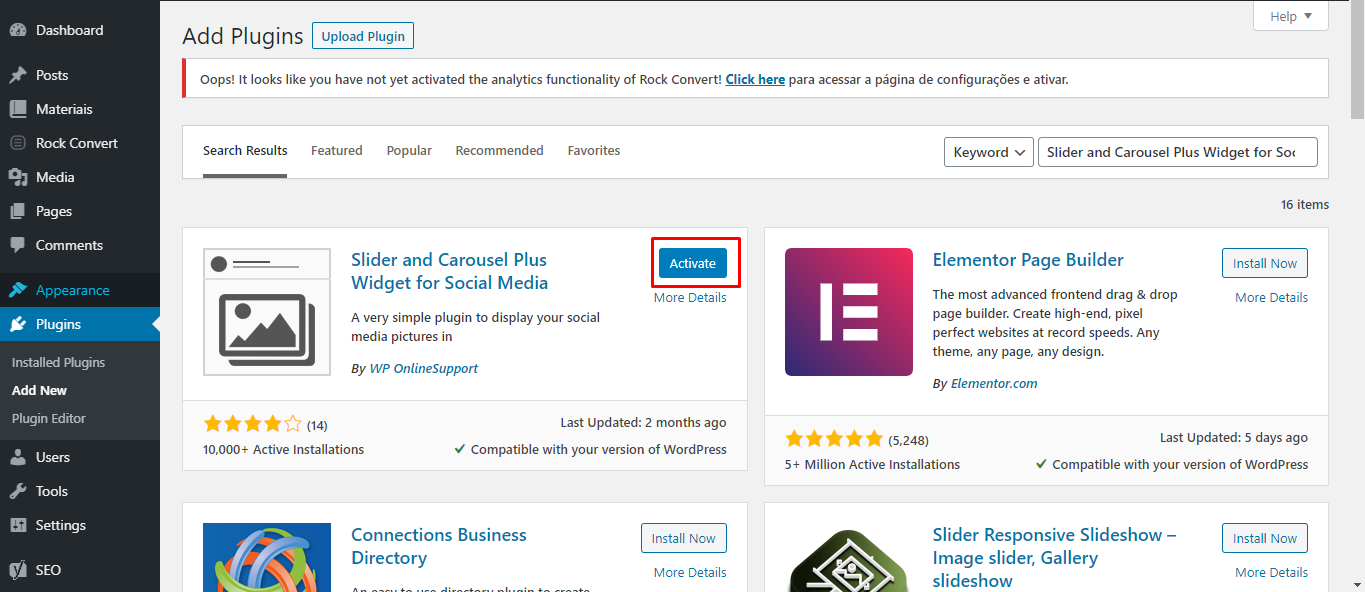
The plugin will redirect you to a new page that requests your permission to send special offers and news via e-mail. If you do not wish to receive that content, just click on Skip.

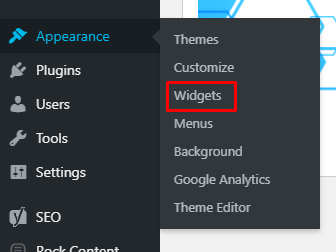
All done! The plugin is correctly installed and activated. Now, let's go to Widgets under Appearance.
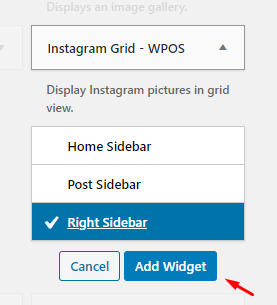
Look for the box called Instagram Grid and select where you wish to add it. The Instagram feed widget placement options vary depending on your WordPress configuration.
Then, click Add widget.
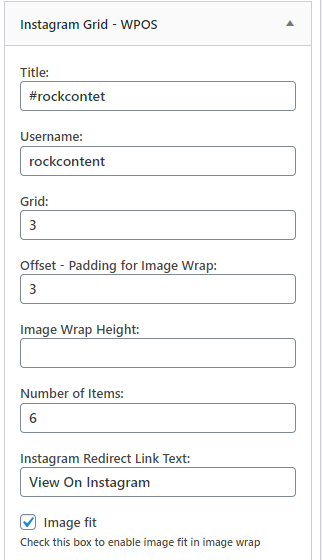
Now is the time to configure how your Instagram feed will appear. It is quite simple to do it, just fill in the fields of the Widget as follows:
- Title is the text that appears over your feed pictures
- Username is your Instagram account name without the @. Make sure the spelling is correct so that the plugin is able to import your feed pictures.
- Grid and Offset is the maximum number of pictures your feed will show horizontally and vertically, respectively.
- Image Wrap Height helps you determine the maximum pixel area for your feed as a whole.
- Number of Items is the maximum number of pictures that will appear on your website or blog. The widget always shows the latest ones based on this quantity.
- Instagram Redirect Link Text is the text that appears when your user wants to open an Instagram picture.
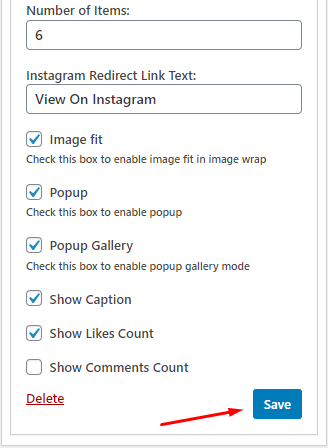
The widget also gives you further options, like Image fit, which sets the image to occupy the entire space of the feed. Or Show likes count and Show comments count, which define whether the likes and comments will be displayed, respectively.
We didn't make any changes to that part. We left it in the Widget's standard format.
If you do not wish to show your number of likes, for example, just uncheck "Show Likes Count".
Now, just click on Save.
And that's it!
