.png?height=120&name=rockcontent-branco%20(1).png)
Learn how to vertically center content within a section!
In this article, we explain to you how you can use padding/margins to vertically center content, and to use tables and table cells for more exact vertical centering.
In most cases, by adding the appropriate amount of top and/or bottom padding, you can easily achieve a vertically-centered piece of content.
Creating a centering table in the Ion platform
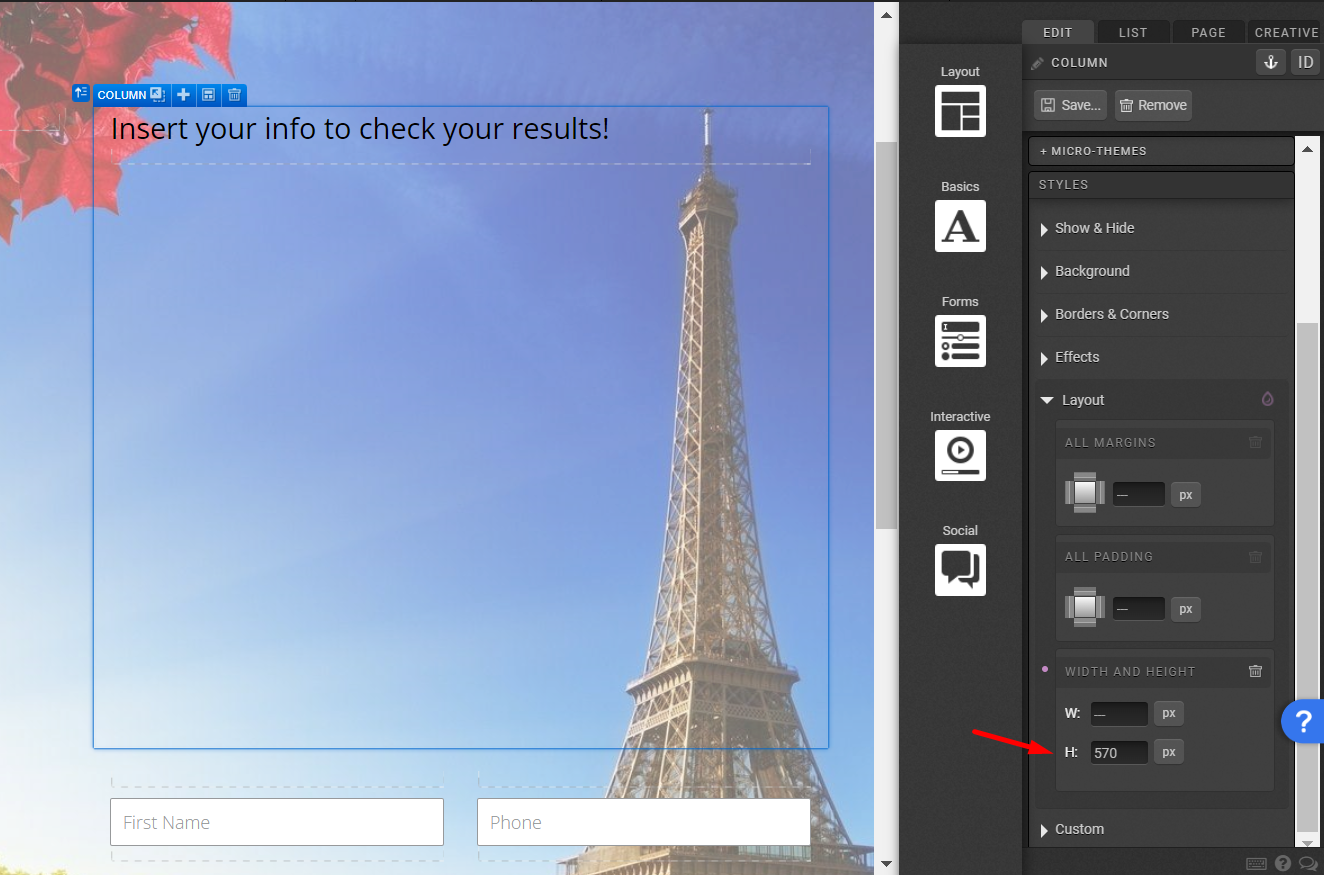
Adding a fixed height to the column provides a frame of reference to allow for the vertical centering to take effect. When we apply fixed heights to any element, we want to consider the amount of content we're adding in, to fit within the space. We can adjust the fixed height to correspond with the content, and we want to keep the various screen sizes in mind.
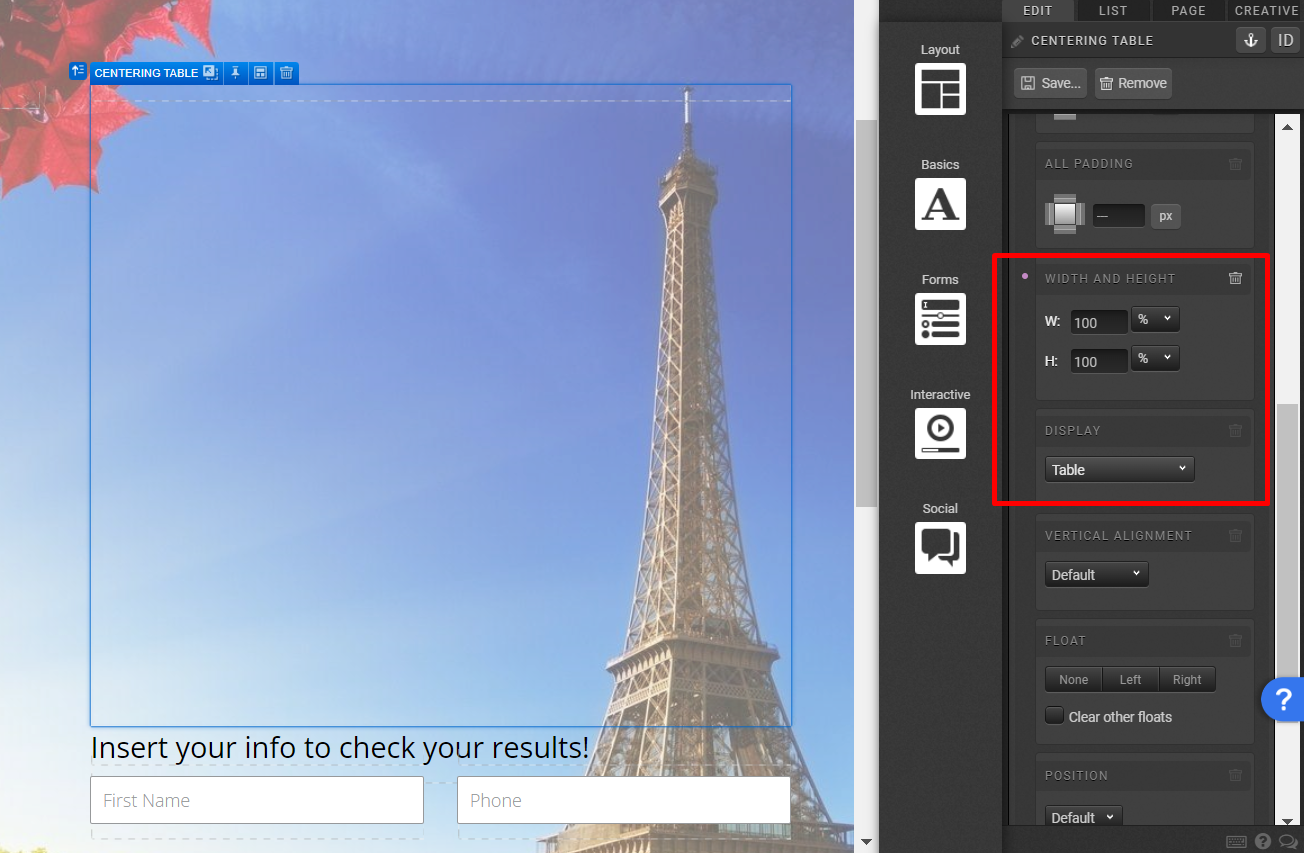
2. Add a container into your column, and change the name to Centering Table, for ease of reference. With your container added and selected, click into the layout dropdown in the EDIT tab and adjust the following settings:
- Adjust Width and Height to 100% each
- Adjust DISPLAY setting to Table
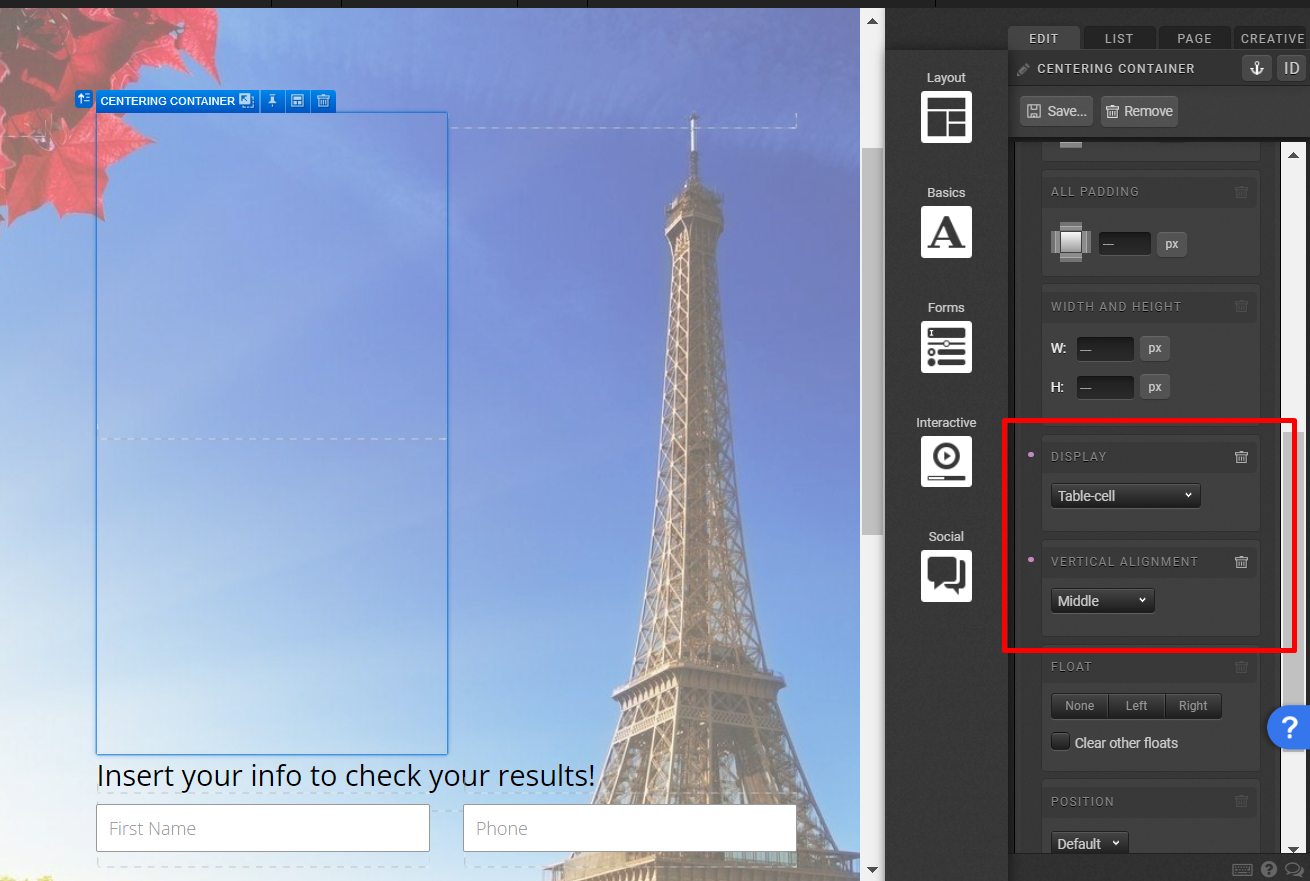
3. Add a container inside of the 'Centering Table' container, and change the name of the new container to Centering Container. Adjust the following layout settings for the new container:
- Adjust DISPLAY setting to Table-cell
- Adjust VERTICAL ALIGNMENT to Middle
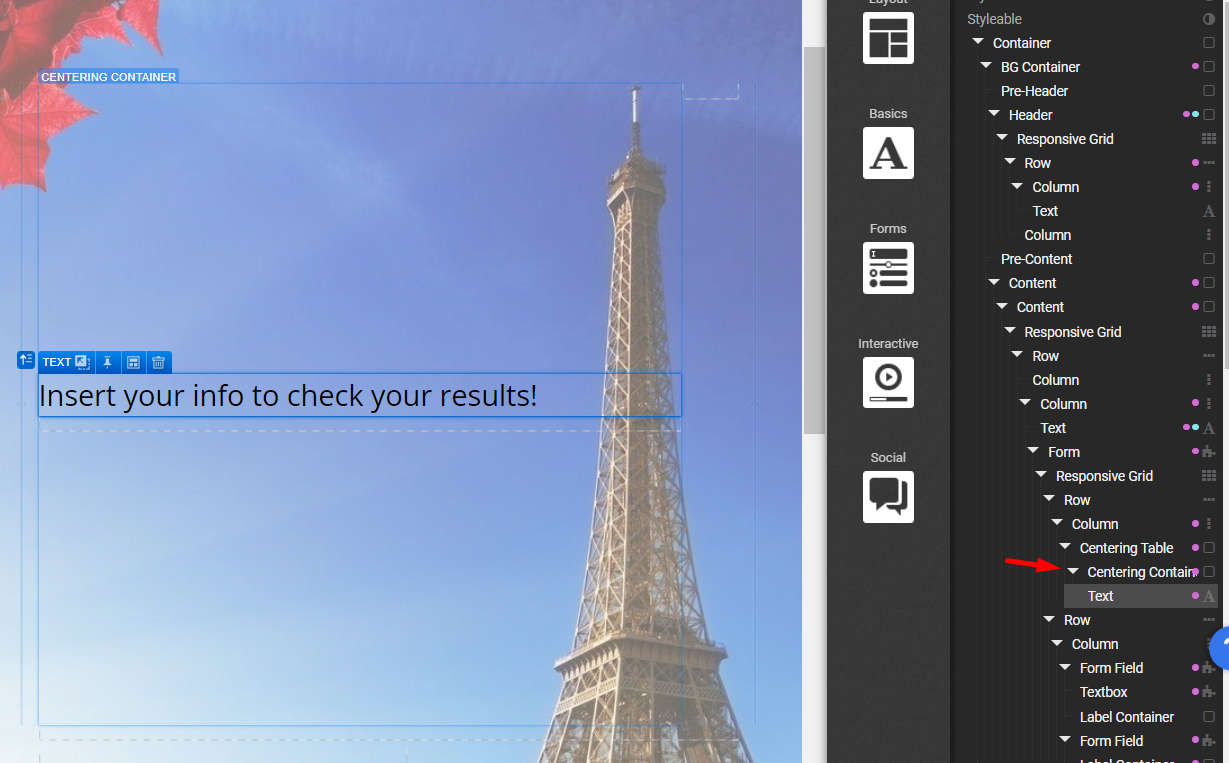
4. Add content inside of your centering container!
If you have any questions, please contact us on help@rockcontent.com. 😀