.png?height=120&name=rockcontent-branco%20(1).png)
The publishing schedule allows for better content production planning and helps maintain an adequate frequency of publications on social media channels.
The publishing schedule brings you all your digital media programming for a certain period. It is where you have access to everything that has been produced for social media and everything that is to come, helping you to spend less time planning and gain more time for what really matters: creating.
It is important to note that, in order to have access to the publishing schedule, the user needs to have the media and project permissions.
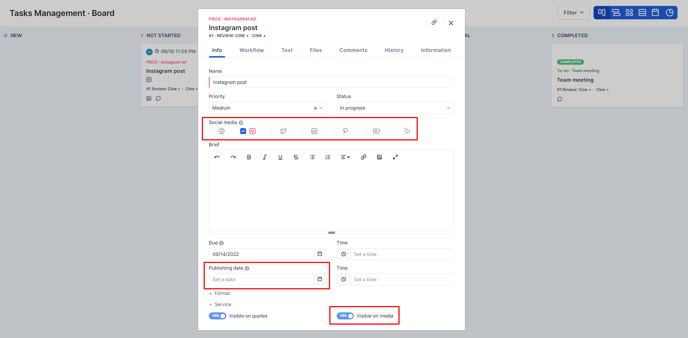
For an asset to appear on the calendar, you must set a publishing date and select a social media on the tasks page in Projects.

You can also set this on the Task Management page, but make sure to activate the "visible on media" permission as well:
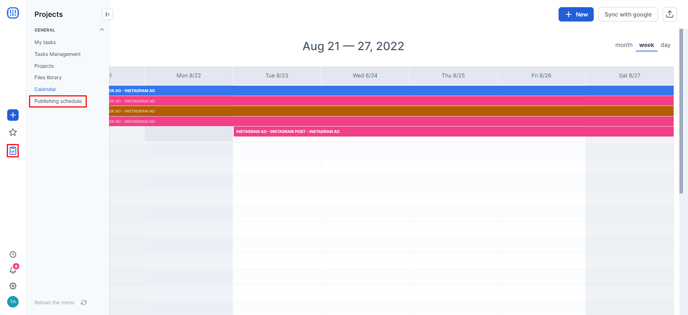
Through the publishing schedule, it is possible to follow the status of each asset and check if the processes are up to date. To access it, click on Projects > publishing schedule.
On this screen, it is possible to have a view of everything being produced related to social media. Assets with no publication date can be accessed by the gray button in the upper left corner. From there, it can be dragged to the scheduled date for publication.
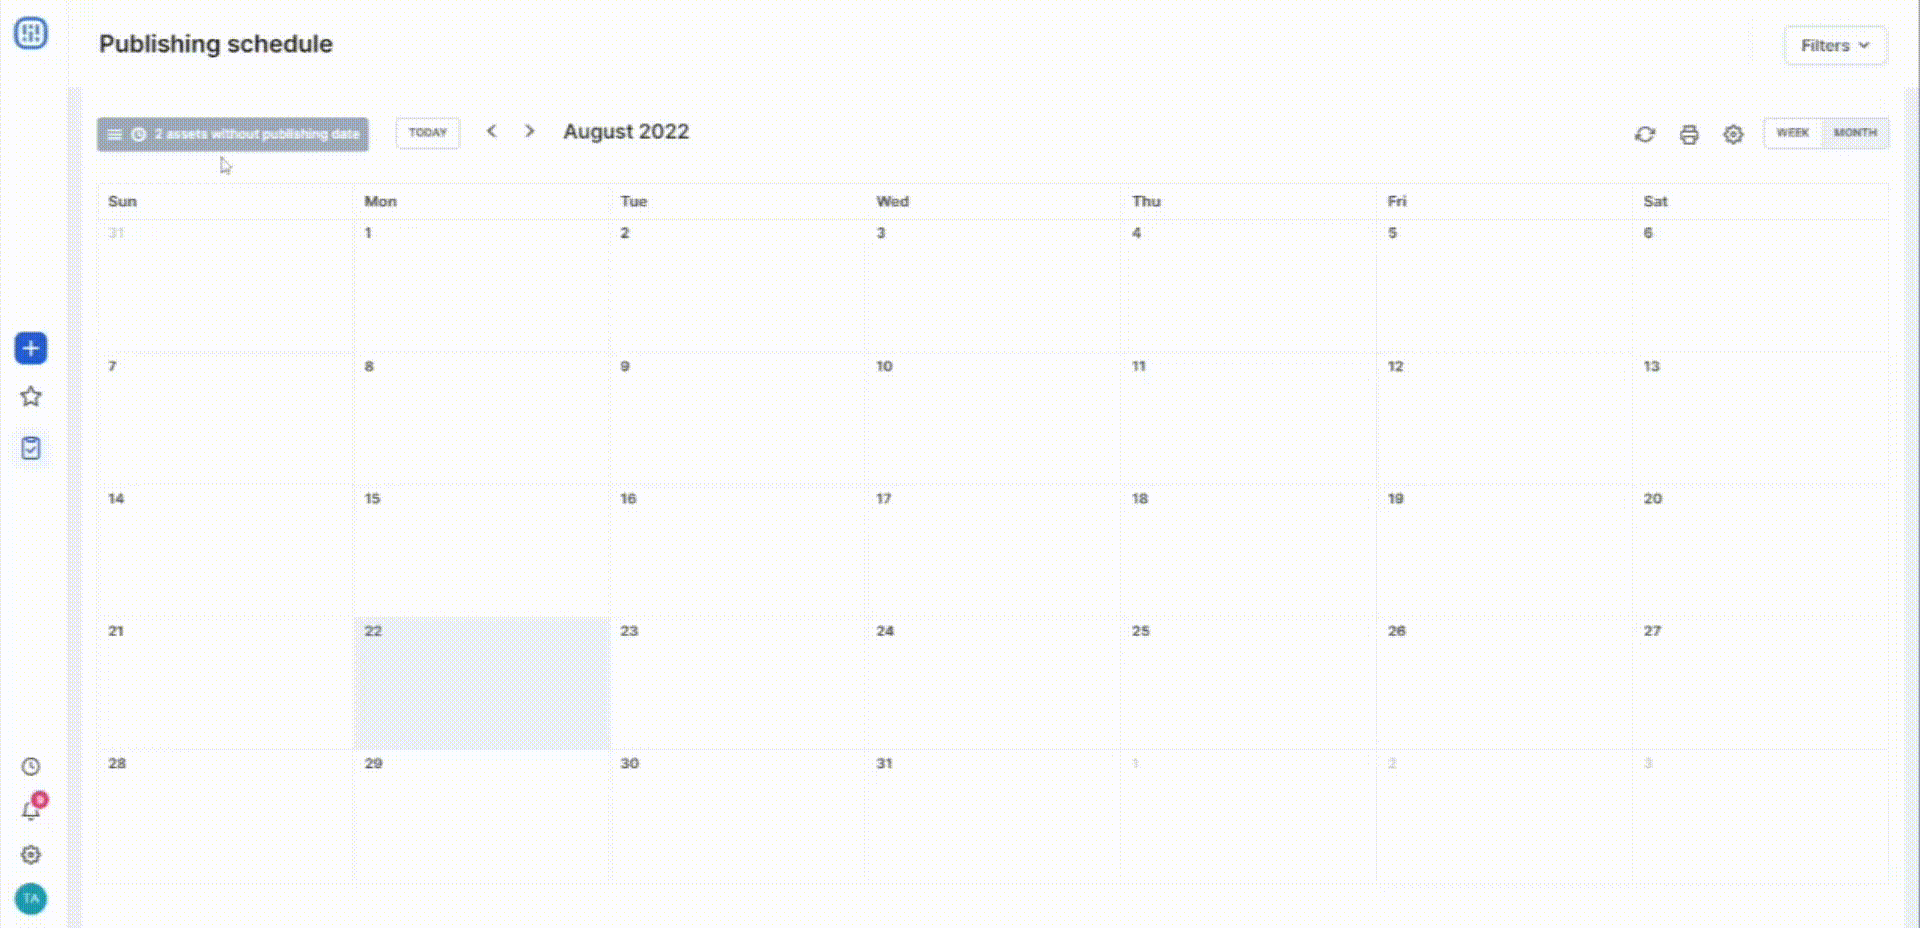
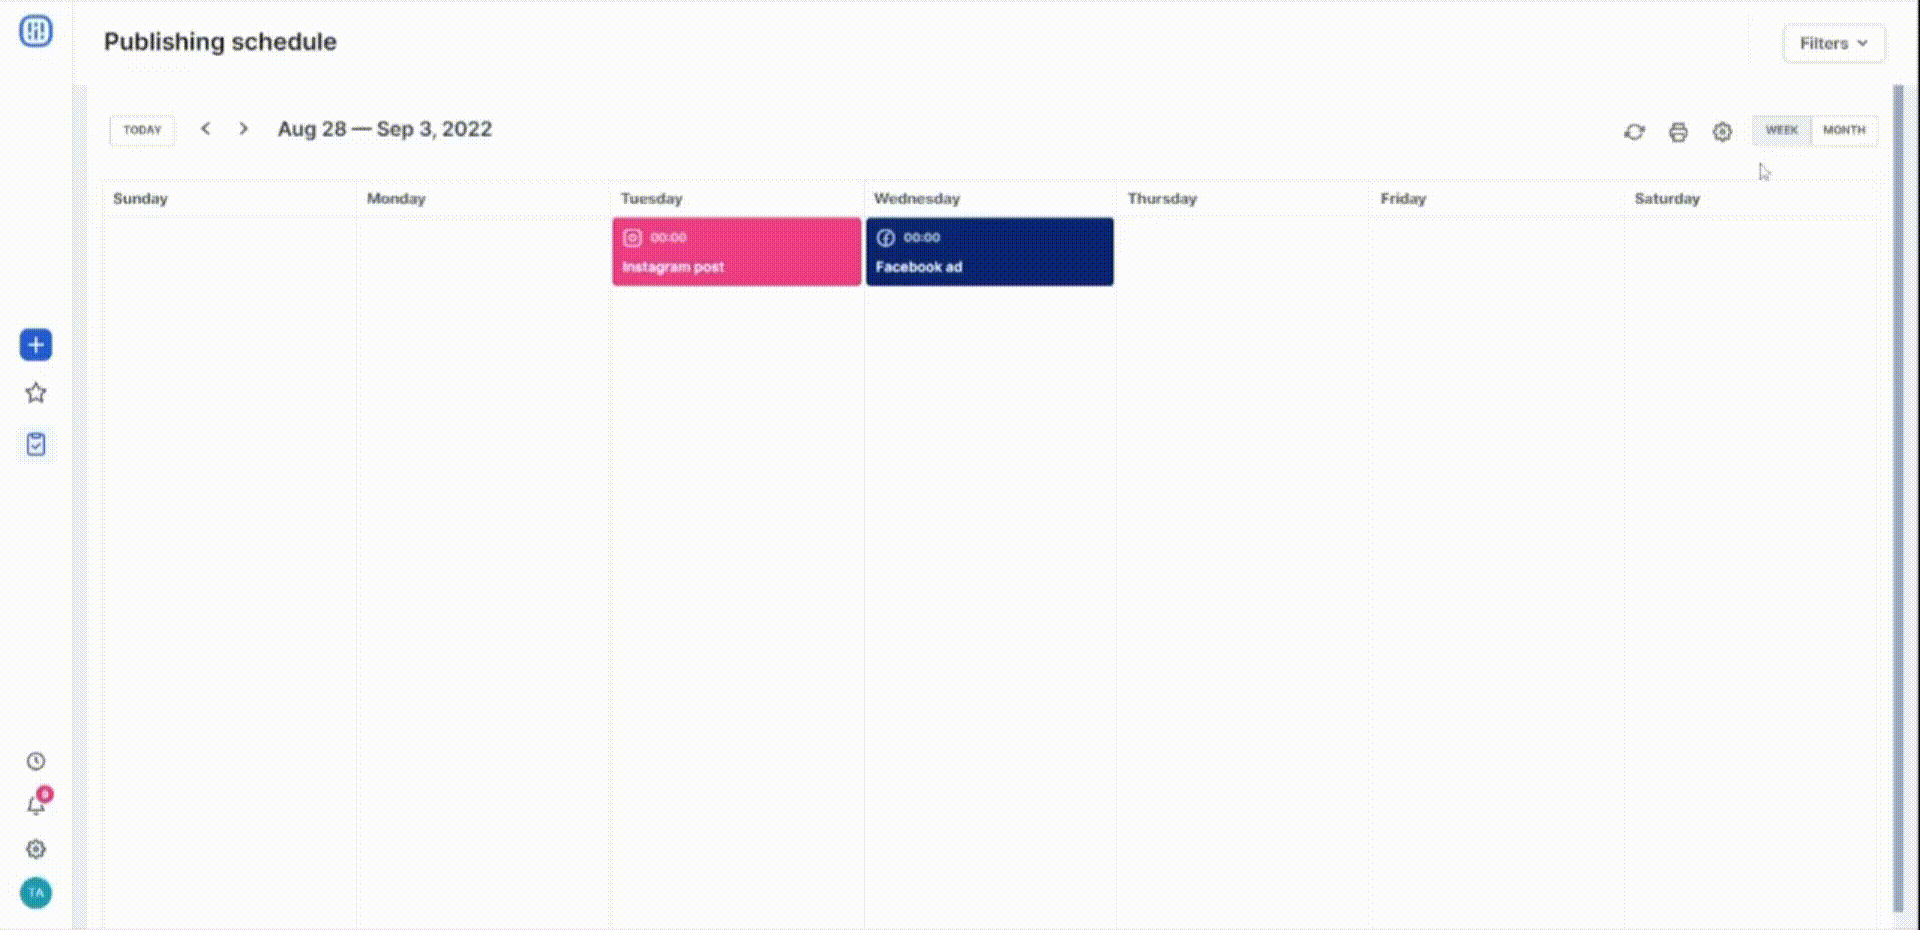
You can choose the weekly or monthly view with the default social media colors, or the colors of the workflow steps, according to your needs.
Another option is to use filters to segment publications by the client, social media, project, status of the asset or the publication.

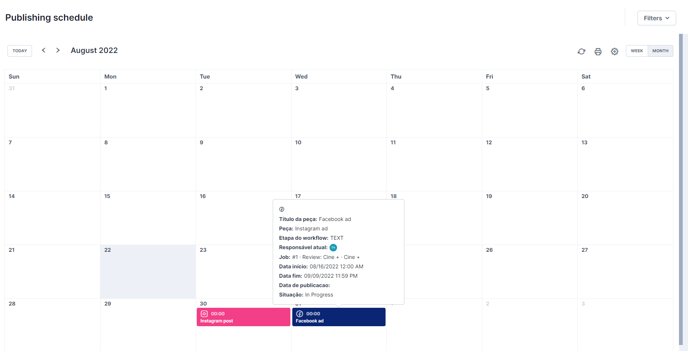
By hovering over each asset, it is possible to obtain information such as: which project it belongs to, which stage of the workflow it is in, and its publishing date, among others. In the weekly view, the system also brings you a preview of the images already added.
Some tips on how to make the most of this feature:
- Define the publishing date: set the frequency of posts and plan it in advance so that there are no gaps in the schedule and so that the creative staff knows exactly what needs to be done and when, avoiding delays in delivery.
- Follow a standard number of posts: going too long without posting anything and suddenly publishing multiple contents at once is not efficient. The public needs to be in constant contact with your customer's brand to remember it.
- Set a time for the posts: each type of content works best at a different time, so it is important to test and analyze to understand at what time your customer audience engages the most and thus schedule the next posts.
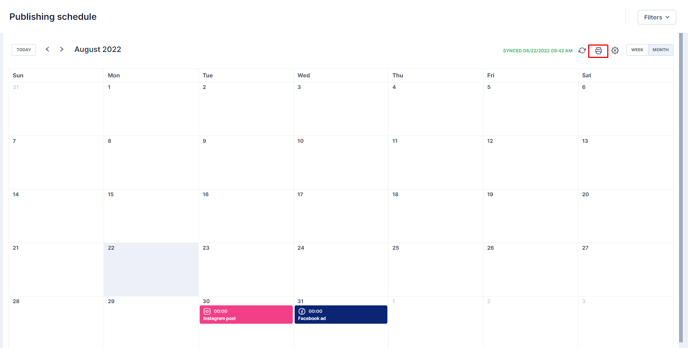
Also, if you want to show the planning to your client, just add the desired filters and click on the printer icon to generate a PDF with all the schedules.
Still need help? Simply reach us at help@rockcontent.com or through the platform chat and we will help you!