.png?height=120&name=rockcontent-branco%20(1).png)
In this article, you will see how to make your agency's financial control easier. Let's start with the entries.
Usually, entries are generated directly from the pre-entry screen, from the approval of proposals.
On some occasions, we understand that it's necessary to insert occasional entries in the system. Those launches cover some important agency's expenses, which do not involve most of the team's daily activities.
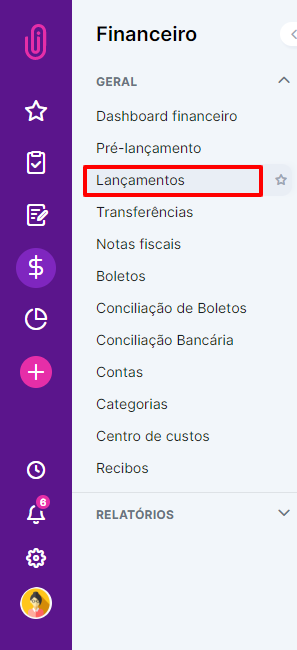
For this, the path is Finance > Entries.
1) New entry
When entering the screen, click on the +New entry button in the screen's upper-right corner.

A New Entry screen will open. Fields with a red dot are mandatory, as well as in other parts of the system.
2) Entry types
In addition to selecting the entry type (incoming, outgoing, or if it is yet to be made), it's necessary to reinforce the importance of registering subcategories to assist in viewing future reports on iClips.
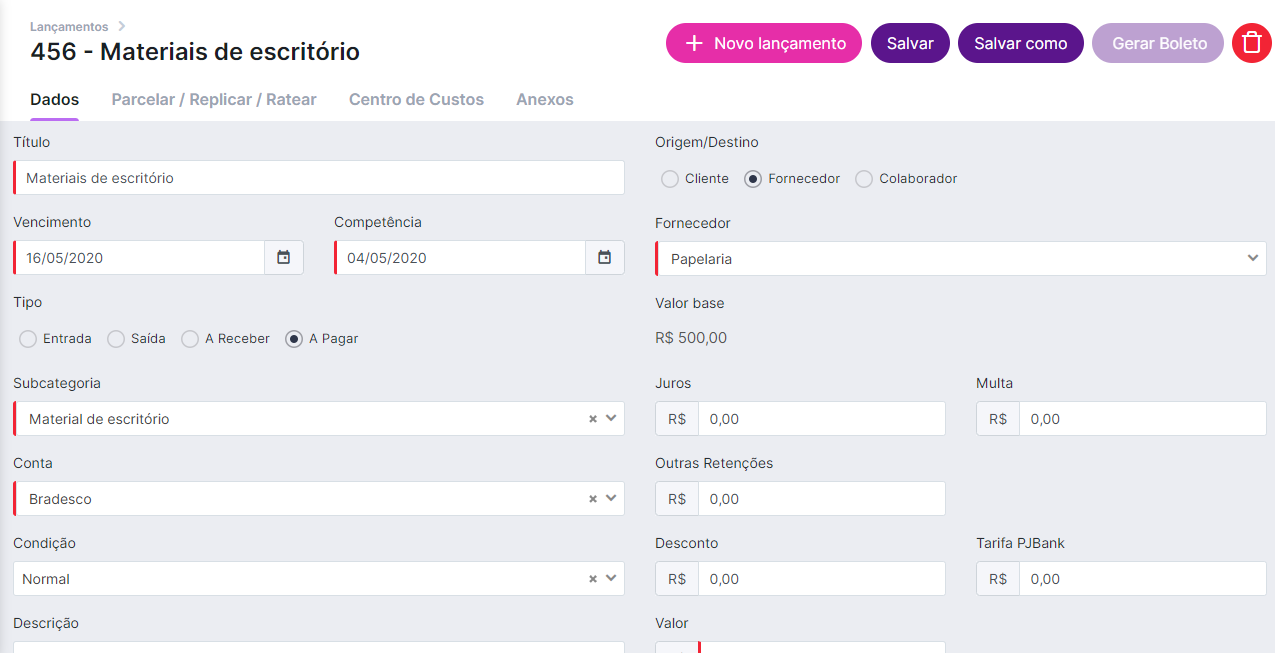
3) Link the entry to some information in the system
As this type of launch is not related to any activity coming from pre-entry, it's necessary to link it to some project. To do this, select it in the same name field. You can also select the document type, making it easier to access future information.
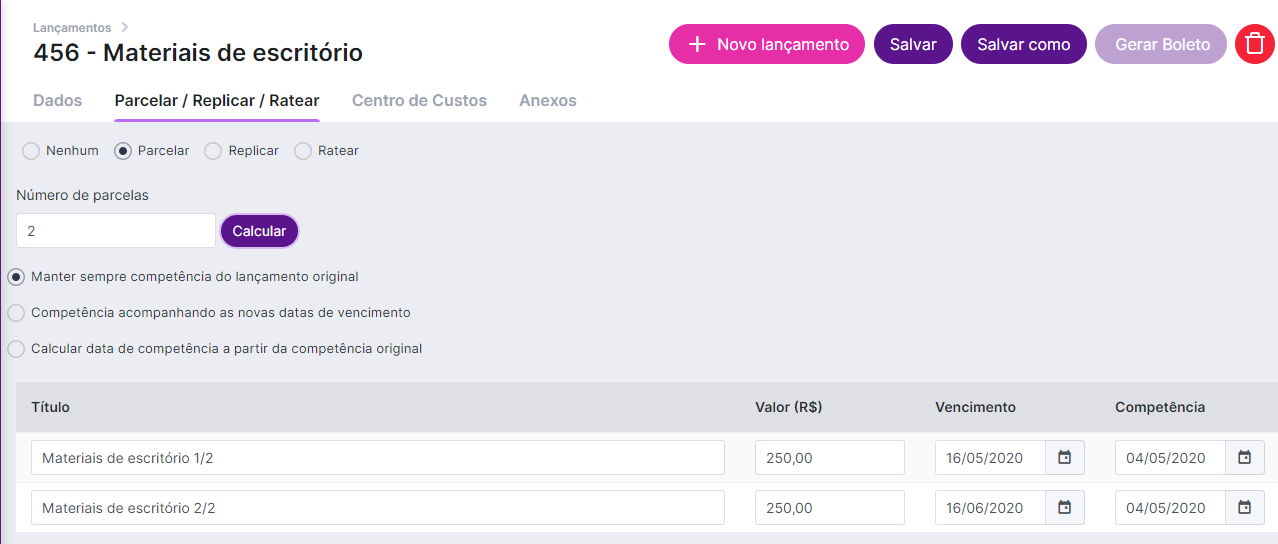
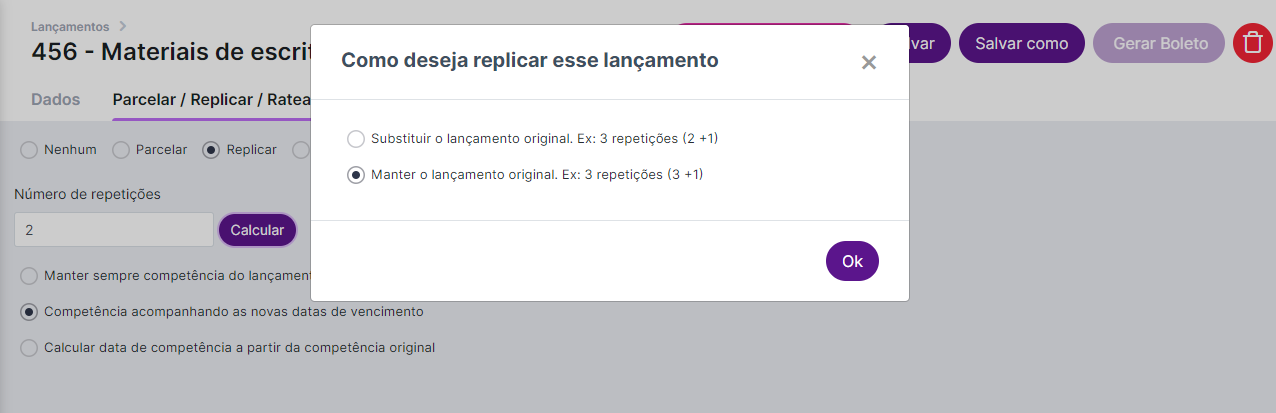
4) Divide/Replicate/Assess
In the top menu, we also have the options to Divide/Replicate/Assess, which gives more versatility to register these launches.
Divide: uses the total value of the entry as a reference to be divided among the installments, defining each one's values and dates.
Replicate: uses the total amount of the entry as a reference to replicate the item, giving options to create new entries similar to the current one.
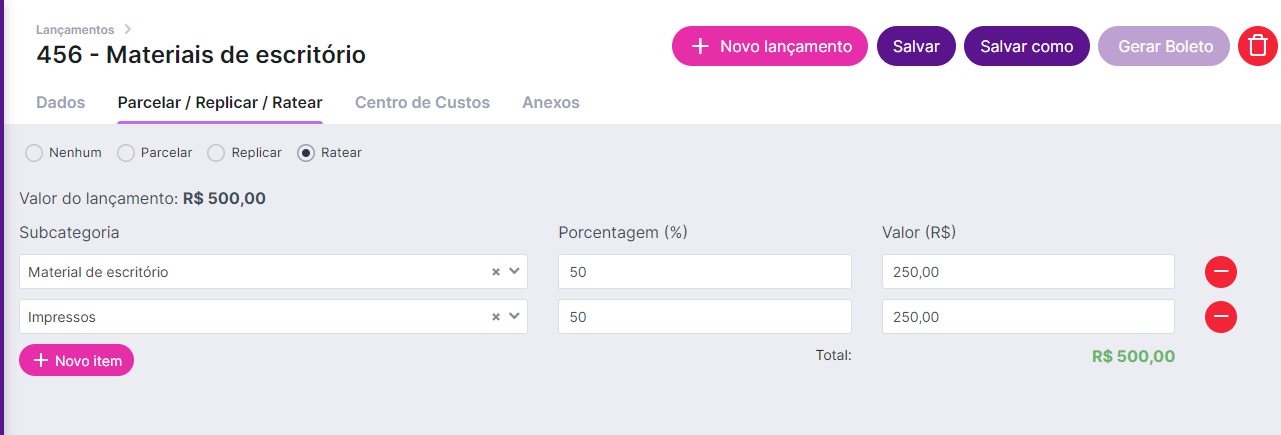
Assess: it gives you the option to divide the amount between different subcategories (within the same indicator) of your accounts' chart. It's possible to divide by value or percentage.
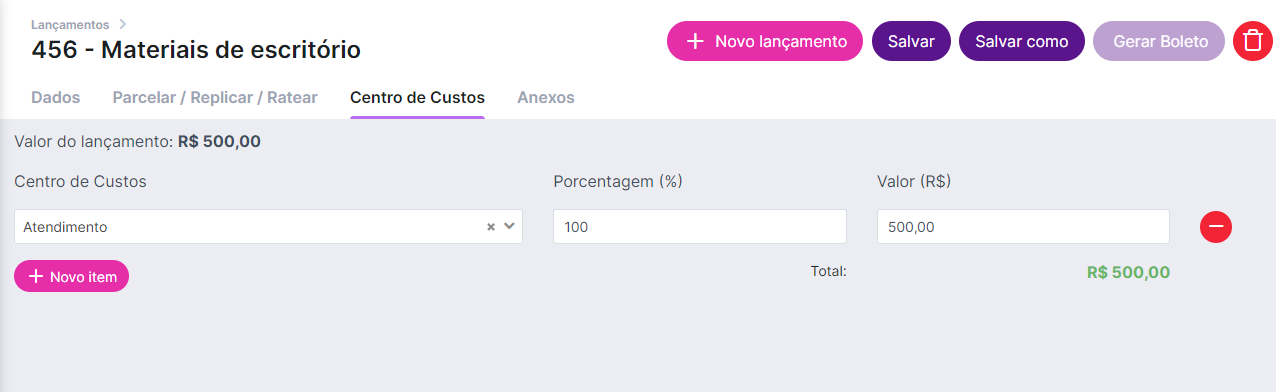
5) Cost center
You can also link the launch to the specific Cost Center, already influencing the amount available for each one. To know a little more about Cost Center, take a look at this article.
After saving, incoming/outgoing entries will be automatically downloaded, and receivable and payable entries will need to be downloaded when payments are made.
Still need help? Just call us at help@rockcontent.com or the platform chat!