.png?height=120&name=rockcontent-branco%20(1).png)
Learn how to create a digital media plan within iClips
One of the digital media options within iClips is the digital media planning. With it, you can create a media schedule for a period of a month or more, and define how much money is available to boost it.
In addition to optimizing your work, this is a practical way to view the schedule and present it to clients. Check out how easy it is:
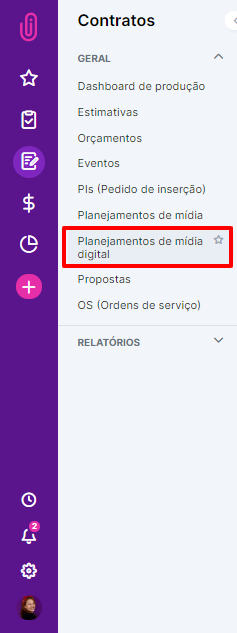
1) The first step is to go into Contracts > Digital Media Planning
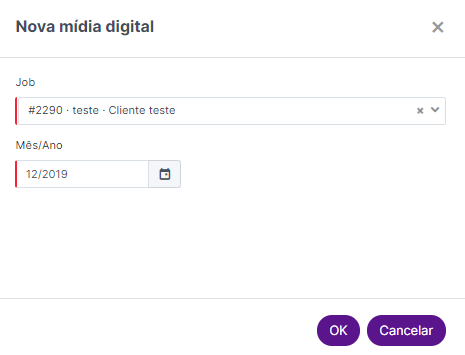
2) Click on New Digital Media

3) Choose the job for which this schedule is being created and the month in which it will be inserted
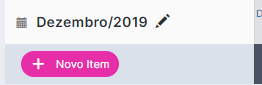
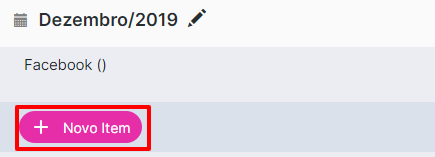
4) Within the digital media plan, you can add a new item
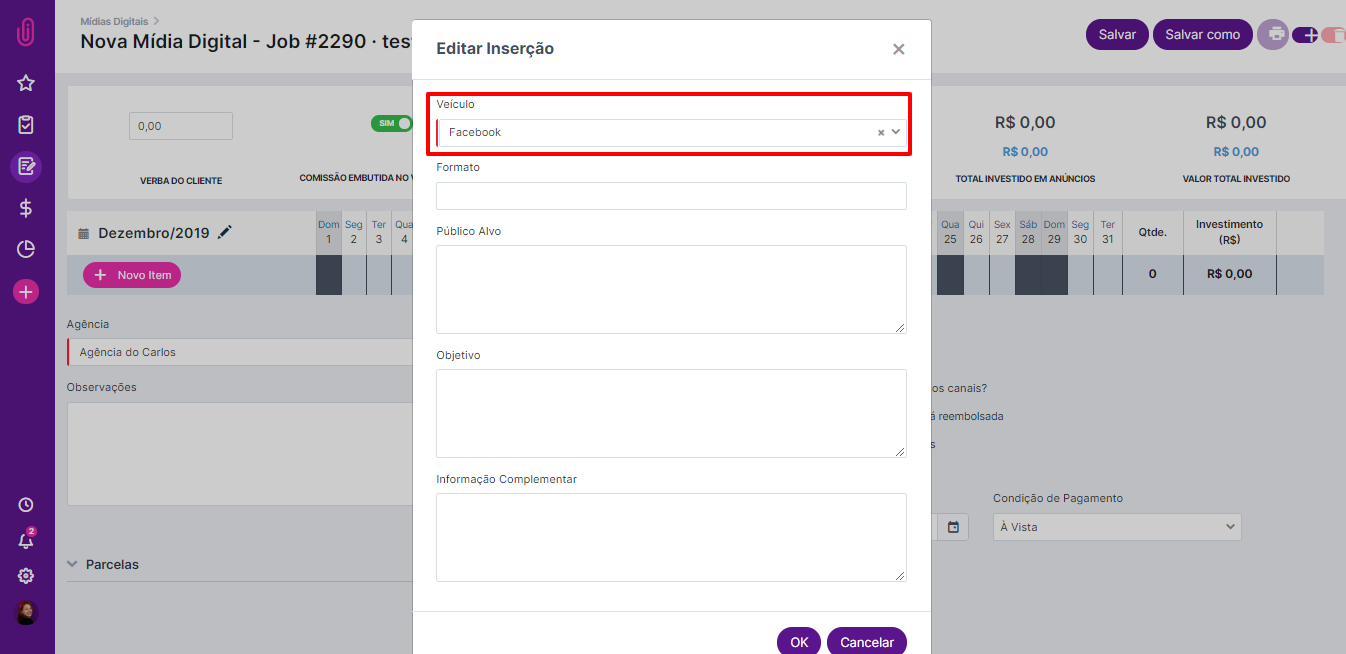
Select the media outlet, which is mandatory, and include more information about this plan, if you feel the need—format, target audience and objectives. If the media outlet is not registered, it can be added at that moment, just type the name and click on "Add". After filling it out, just click "Ok".
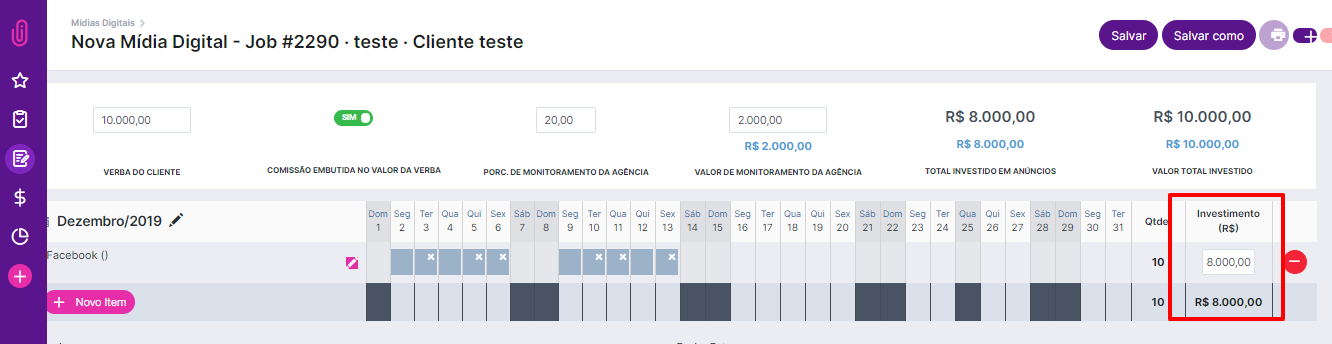
5) Now you have to fill in the budget information for this plan
The client's budget is the total budget for this plan, the commission can be embedded or not in this amount. If it is not included, iClips will add the amount + the commission amount as the client's total payment amount. For example, if the amount that the client wants to spend is US$ 1,000.00 and its monitoring percentage is 20% and is not included in that amount, they will have to pay you a total of US$ 1,200.00. However, in case it is embedded, you will invest US$ 800.00 in digital media and the other US$ 200.00 will be your commission.
If the agency charges a monitoring value, it can also be included in the agency's monitoring value field.

6) Select the insertion dates
In this table you must select the dates on which the campaign will be published. If it is for a continuous period, just click the start date and the end date to mark all days in that interval.
If you have other posts or other social media, you can add it via the "New Item" button.
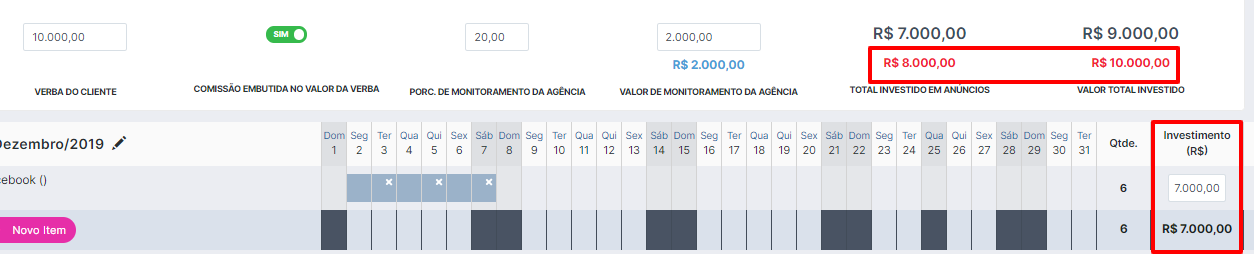
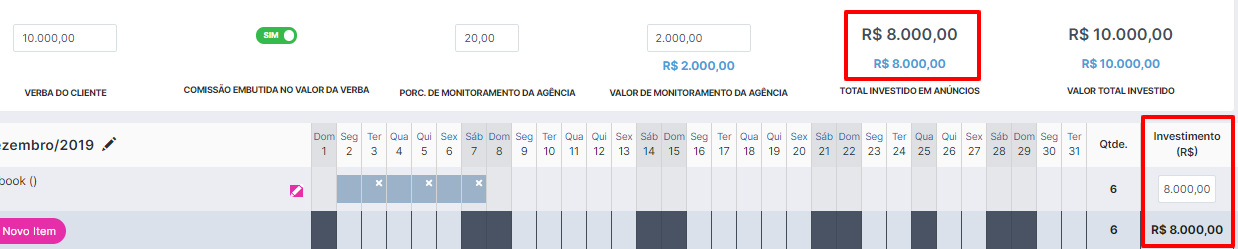
In the Investment field you can select how much will be spent on each medium from the initial budget that was made available by the client. As soon as a value is filled for a medium, the calculation at the top of the screen is updated.

In case your entries are above or below the allowed value, the fields will be in red. When they turn blue it means that the available value has been distributed correctly and your planning is ready to be finalized.
7) Defining payment conditions
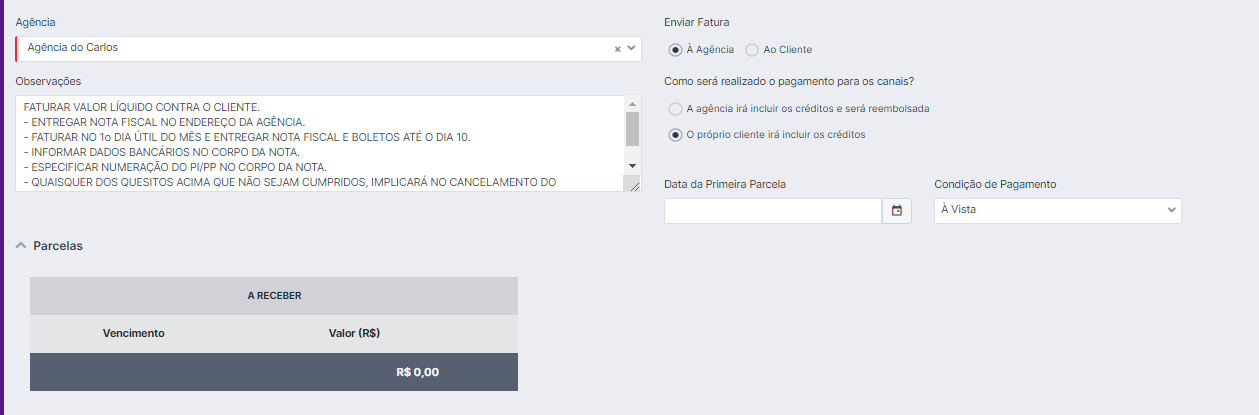
After you have planned your inserts, it is time to define how the amount will be paid to the agency. Below the table you can define which agency will be billed, whether the invoice will be in the name of the agency or the client, the payment conditions, how the media outlets will be paid and, if any, include comments.
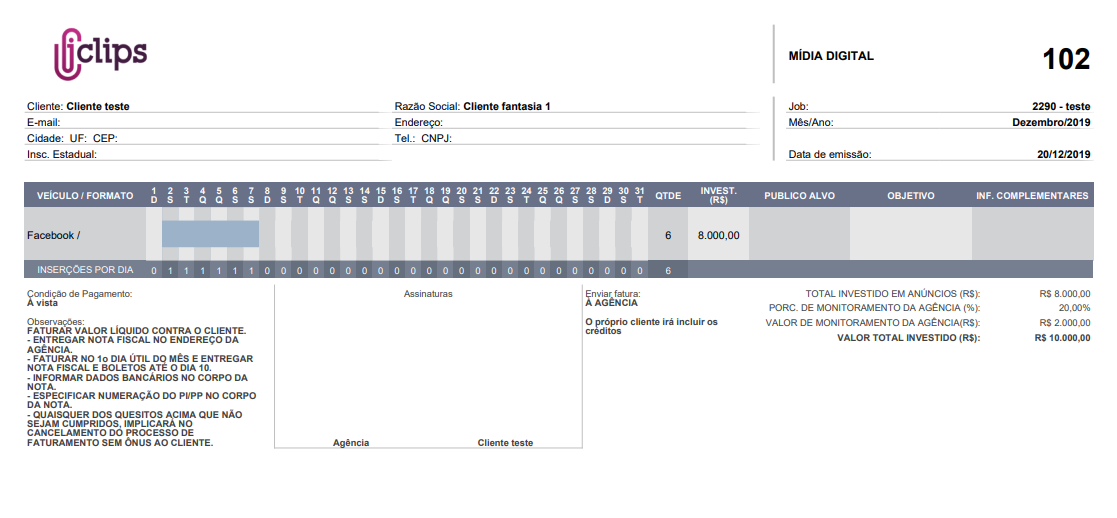
8) Now just save!
In the upper right corner of the screen, you have the option to generate a PDF file of your plan.

In addition to sending it to the client, this document can be used by the agency who will schedule the posts and for the creative staff to control which days the posts will be sponsored and better target the content.
Still need help? Simply reach us at help@rockcontent.com or through the chat platform and we will help you!