Creating a banner
In this article, you will learn how to create a new banner using Rock Convert.
Before you begin, make sure that you already have Rock Convert installed on your WordPress blog.
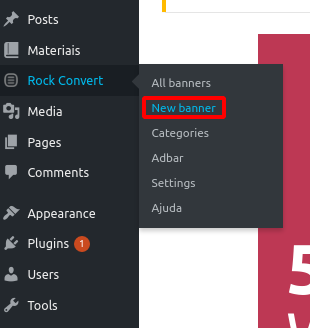
On your WordPress admin panel, select Rock Convert > New Banner.

Select New Banner.

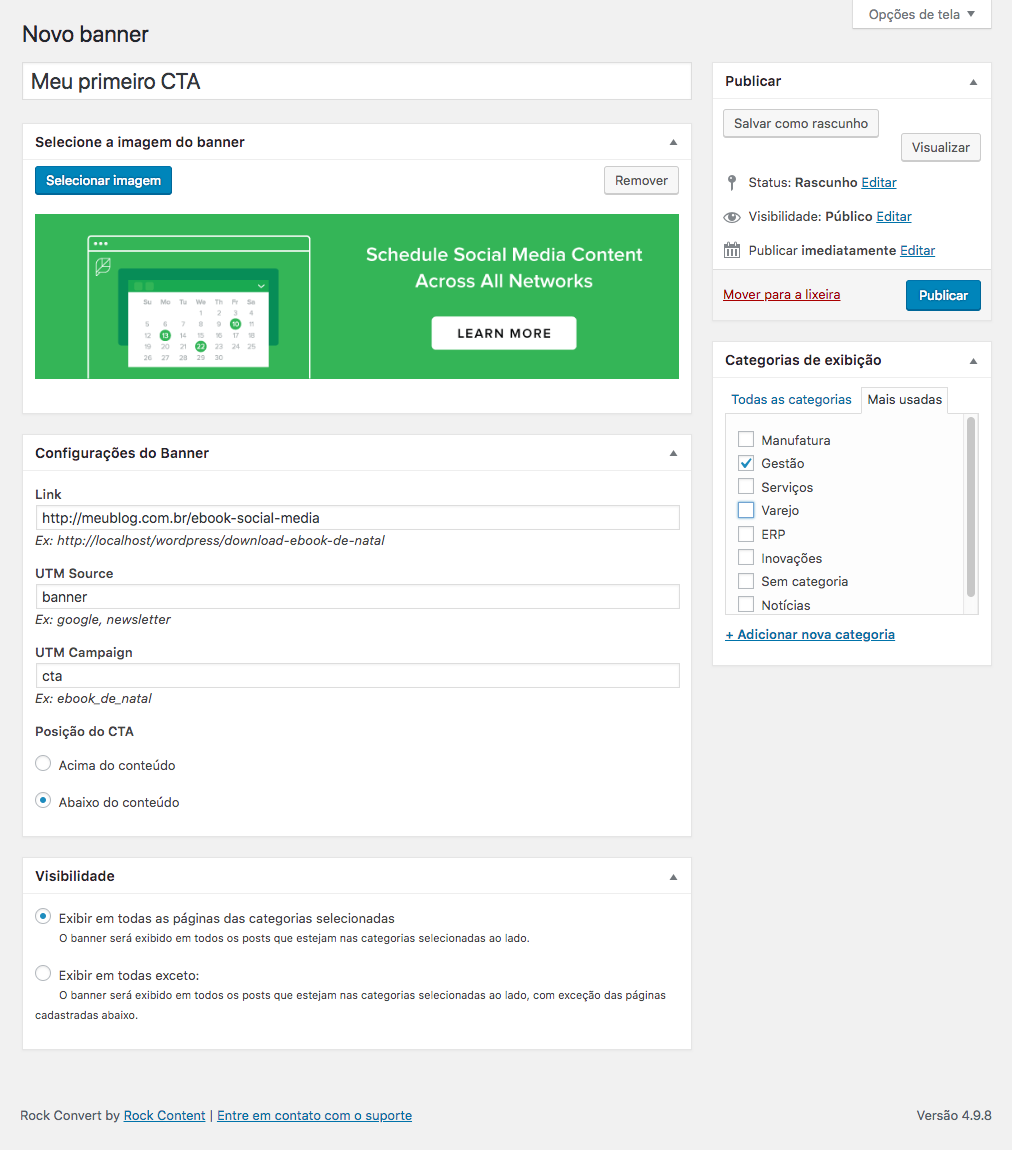
Now, just fill out the banner's information:
Title: That is the CTA identifier. This title does not appear on your site and serves as a way for you to identify your banner on the list.
Image: That is the banner's image. We recommend you use an image with the same width as your blog—usually between 750 and 960 pixels.
Link: Where the user will be redirected to after clicking the banner.
UTM Source and UTM Campaign: Parameters you will use to identify the banner on your analytics tool.
UTM is a monitoring feature you can use with Google Analytics. Click here learn how it works!
Visibility: Here you can hide your banner from specific pages. If you don't want your banner to show up in a post, just add the post's URL to this section.
Display categories: Select the categories in which this banner will appear. In case no category is selected, your banner will not be shown anywhere on your site.
Display tags: Select the tags in which this banner will appear. It's optional and your banner will be shown even if you don't select a tag.
Reviewing your work
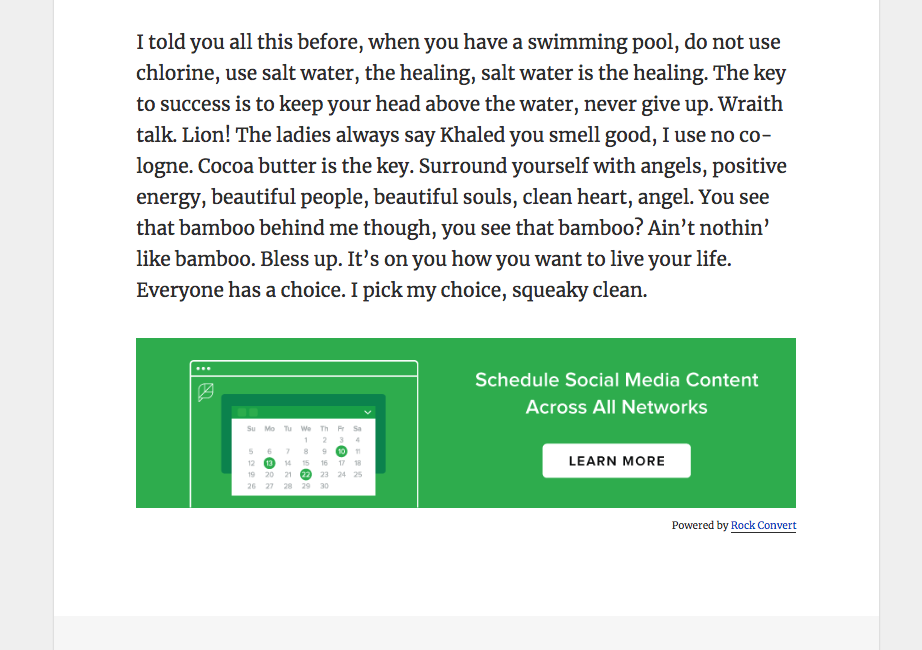
In the end, your screen should look something like this:

.png?height=120&name=rockcontent-branco%20(1).png)