- Rock Content Knowledge Base
- Stage / WordPress
- First Steps | Stage
How to add a domain on Stage
In this article, you will learn how to add a domain or a subdomain to your website or blog hosted at Rock Stage.
Requirements
For this procedure to work, you must have a registered domain. If you own or have access to your domain, you can skip this part. If you do not own a domain — or do not grasp this concept yet —, keep on reading.
Adding your domain on Rock Stage
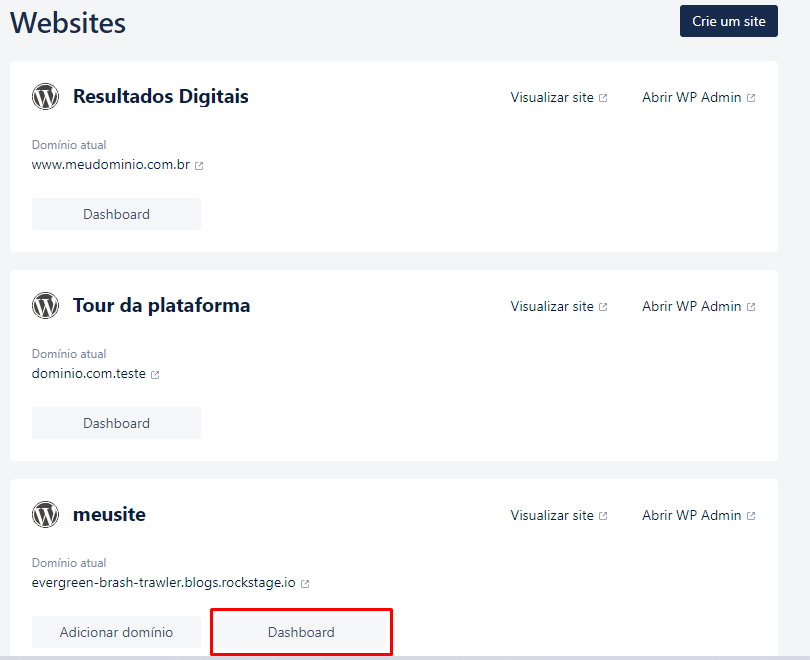
The first step is to access your Rock Stage dashboard. After logging in, from your list of sites hosted on the Stage, choose the one you want to point to, and click "Dashboard":

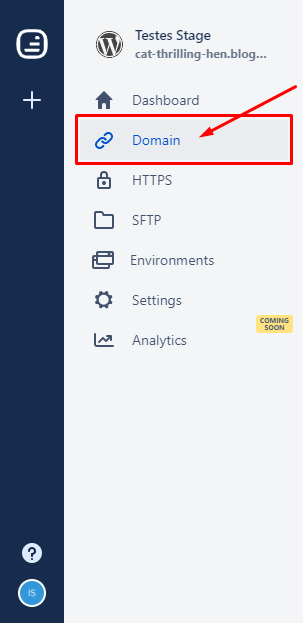
This site's dashboard will open and on the left side of the screen, you will click on the "domain" option:

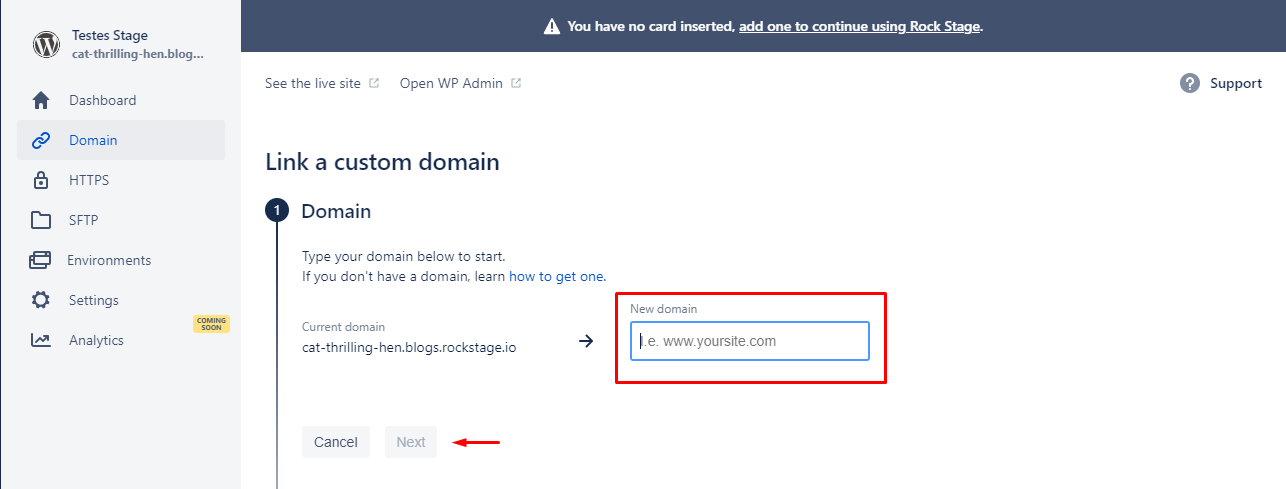
Now, in the "New Domain" field, you will add your registered domain and then click "Next":

At this point, the platform will add this domain to our systems. Now you go to your domain manager to make the appointment!
DNS configuration
Now that your domain is configured on Rock Stage, you need to point the DNS to our IP. This setup must be done in your domain manager.
.png?height=120&name=rockcontent-branco%20(1).png)