.png?height=120&name=rockcontent-branco%20(1).png)
- Rock Content Knowledge Base
- Stage / WordPress
- First steps | Wordpress
How do I change my blog's logo?
To change your blog's logo, just access your WordPress Admin Panel (blog.yourblog.com.br/wp-admin) and, on the left sidebar, pick Appearance → Customize → Search for your logo option.
Note: Searching for the logo change option → the section title might vary depending on your template and can be called "header", "site design" or "logo".
You must find the option to change your logo and click "remove".
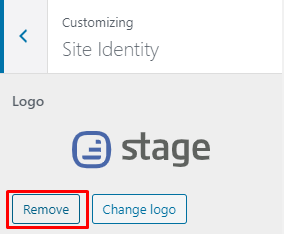
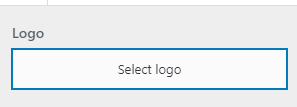
After removing it, you can select a file for the logo again by clicking on the "Select logo".
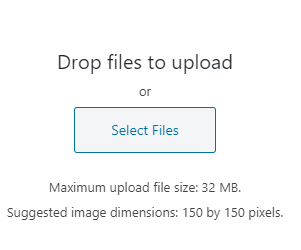
You will then go to the "Send Files" tab and select the new logo file.
After selecting the new logo file, check if your blog's name is correct under the "URL" field. Then, click on select.
After selecting your new logo, just click on "Publish" to update your blog with it.
All done! Now, you have a new logo on your blog!
Do you still need help? Check here how you can get in touch with our support team!