Navigation
Dashboard > Any Live Stream > Setup > Templates
Dashboard > Manage > Templates
Permission Level
Administrator | Developer
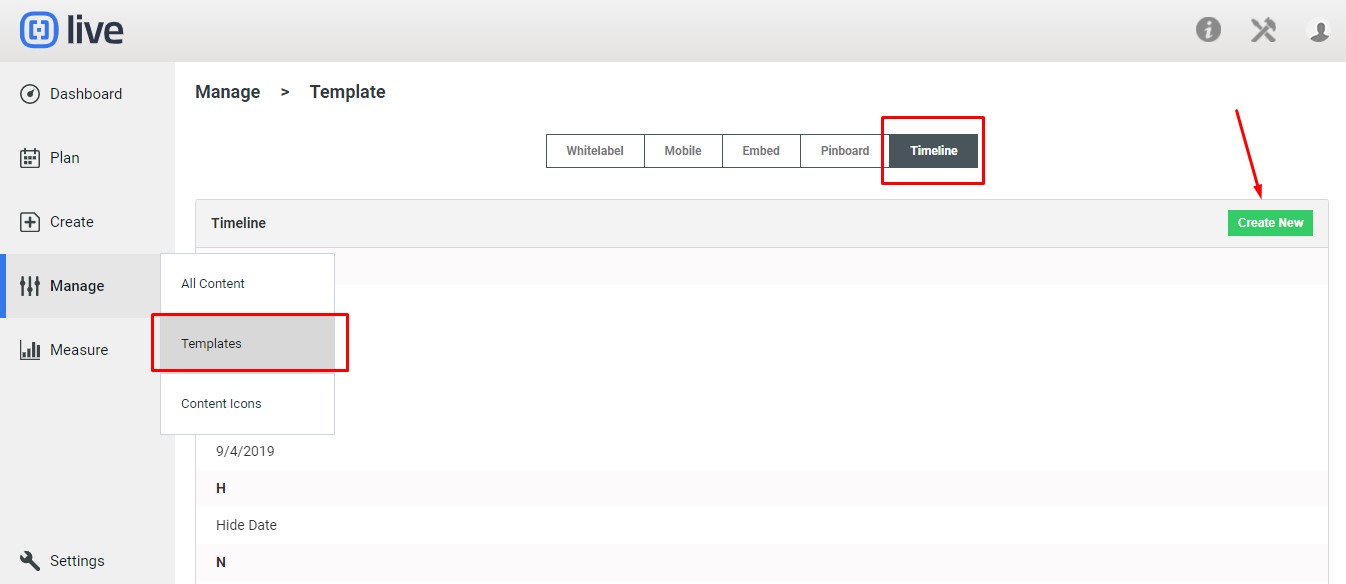
1. From within your stream, go Menu > Setup > Templates at the top of the page. Alternatively, you can click on Manage > Templates in the left-sidebar.
2. Click on the Timeline tab at the top of the Templates page and then on the Create New button.

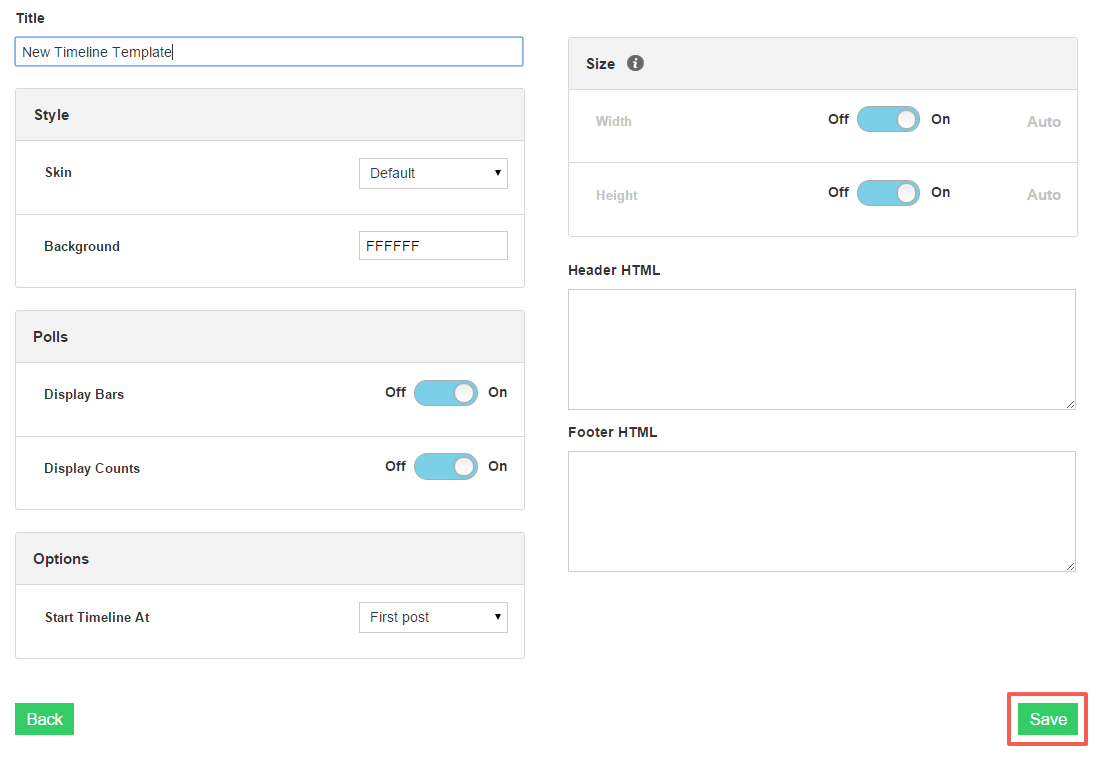
Choose the settings for your timeline template. The following customization options are available:
Title
- Insert a title for your timeline template.
Style
- Skin: Choose from the default (white post background); Midnight (Black post background)
- Background: Set the background color of your timeline template.
Polls
- Display Bars: Switch the slider to On to display poll results as bars, as opposed to a number of votes.
- Display Counts: Switch the slider to On to display the number of votes each poll question has received.
Options
- Start Timeline At: Use the drop-down menu to select whether you would like your content to be displayed starting with the first post in your stream, or the most recent post made in your stream.
Size
- Automatic: Timeline templates are responsive and can automatically resize to the size specifications of any device. Use the slider to turn this feature On.
- Width, Height: If you prefer, you can set a fixed width and height size for your timeline template in pixels.
- Header HTML: Add custom HTML, CSS, or JavaScript to the Header portion of your timeline template.
- Footer HTML: Add custom HTML, CSS or JavaScript to the Footer portion to further customize the look, feel and behavior of your Live timeline template.
Click Save to save your template's preferences.

See More
Displaying your Stream with a Timeline Visualization
How to Get the Embed Code for your Stream
.png?height=120&name=rockcontent-branco%20(1).png)