.png?height=120&name=rockcontent-branco%20(1).png)
Configuring DNS
You will now learn how to configure the DNS of your domain using CloudFlare for your blog or website that is hosted with Rock Stage:
1. Access Cloudflare with your login and password and select your domain

2. After that, choose "DNS"

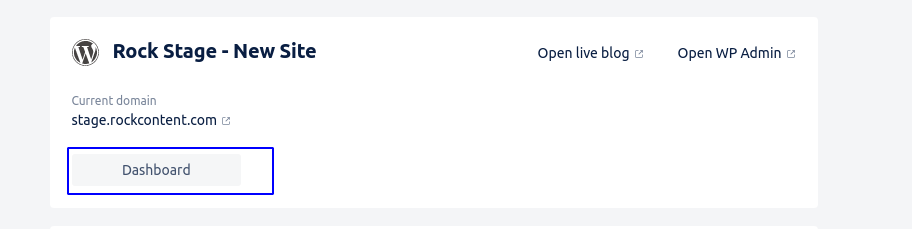
3. Now, you need to access Stage's admin panel so you can obtain the necessary information to configure the DNS. Open Stage in a new tab and click on Dashboard:
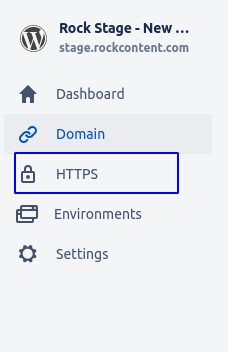
4. With the Dashboard open, enter the Domain submenu:

5. The DNS configuration data will show up like this:

Name field: Shows the domain or subdomain you wish to configure.
For example:
If you are configuring the DNS of your domain, it will probably show up as mysitedomain.com.
In the case of a subdomain, it will probably show up as blog.mysitedomain.com or www.mysitedomain.com or something like this.
Target field: Shows the value generated by our service that points to your domain or subdomain.
Please note: There is a difference between configuring domains and subdomains. Subdomains use the main domain and are differentiated by adding another name besides the domain name.
For example, blog.mysitedomain.com is a subdomain, while mysitedomain.com is the main domain you registered.
If you wish to configure a domain, check here. If it is a subdomain, here.
Domain DNS configuration
7. After accessing "DNS", all the records linked to that domain on CloudFlare will show up. To configure your domain's DNS, create or edit a type A record related to the main domain and use the IP 151.139.128.10 or a CNAME record. Fill the second field with the value you found as Target on Stage and click on the cloud to change it to gray.

All done! 😉 Your domain's DNS is now registered, and in up to 48 hours, your URL will be working properly.
Subdomain DNS configuration
7. After accessing "DNS", all the records linked to that domain on CloudFlare will show up. To configure your domain's DNS, create or edit a type A record related to the main domain and use the IP 151.139.128.10 or a CNAME record. Fill the second field with the value you found as Target on Stage and click on the cloud to change it to gray.
Note: in the first field, you must enter the additional value of your domain. The example above has "blog" so we get blog.mysitedomain.com as subdomain.
This field must be filled according to the subdomain you wish to configure.
All done! 😉 Your domain's DNS is now registered, and in up to 48 hours, your URL will be working properly.
Security certificate validation, or SSL (secure site or blog)
For our paying clients, we offer a feature that allows your website or blog to load in a secure mode in browsers, like in the image below:
Follow the next steps to enable this feature:
- Access the SSL section on the Rock Stage panel:
Please note: The SLL section is only displayed to our paying clients.
2. Only after the DNS configuration is recognized by our service, your SSL panel should look like this:
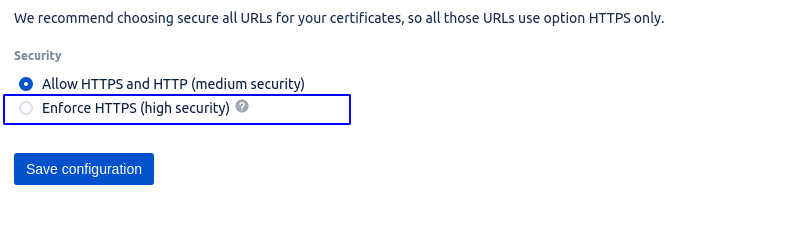
You must choose the "Force HTTPS (High security)" option and save the configurations so your website loads in a secure mode.
Important!
If you are a client and had your project migrated by Rock Stage's staff, the Name and Target data are already available on your Rock Stage panel and were also sent via e-mail at the end of the migration process.