.png?height=120&name=rockcontent-branco%20(1).png)
Don't know how to start putting together a project? Read this article!
We often say that "projects are the heart of Studio". Everything within Studio needs to be linked to a project, which is why this is so important.
Through a project, it is possible to integrate all the company's departments, generate demands and monitor all requested tasks.
The first thing to know is that each project is represented by a number, which is its unique identifier. When launching the first project in Studio, it will receive number 1, and the second project will receive number 2, and so on.
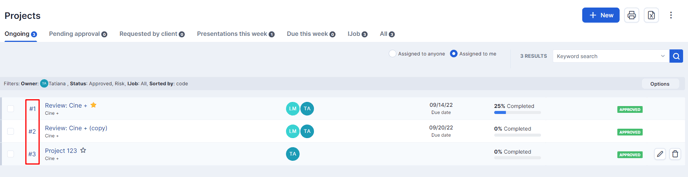
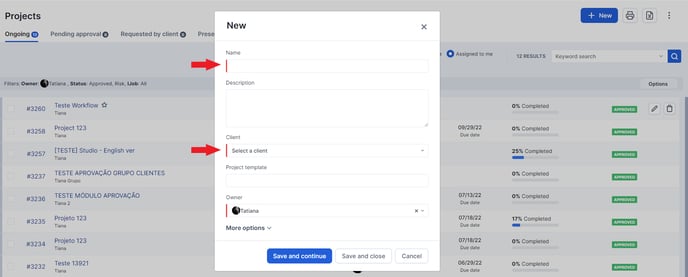
To create a project, go to Projects > Projects. Click on the "+ New" button.
A new screen will open with the fields to be filled in. The fields in red are mandatory:
Important tips:
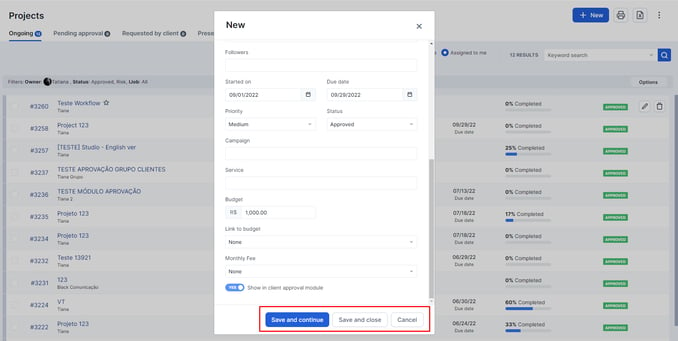
- The project priority will organize the task list of the employees involved and the dashboard for each department.
- Only projects with 'Approved' or 'Risk' Status are sent to traffic controls. For Studio, signaling these 2 statuses is the command to start the project.
- The Monthly Fee and Budget fields will be filled in if the project is related to a fee contract or if it has a fixed amount to be spent.
- The same project can be related to several project templates (Read here about project templates).
After filling in all the necessary information on the home screen, you can:
- Save and Continue: save this information and continue filling in other details, such as the creative brief and definition of assets.
- Save and Close: close this information and continue registering the rest at another time.
- Cancel: delete the project you just filled in
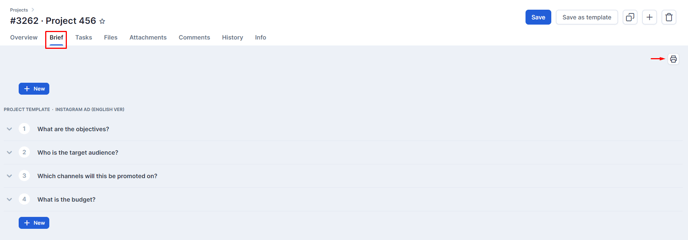
Creative Brief
You must answer the questions that were registered in Studio when creating the project template.
On this screen, you can enter information and use text editing features. It is also possible to print the brief by clicking on the printer icon in the upper right corner of the screen.
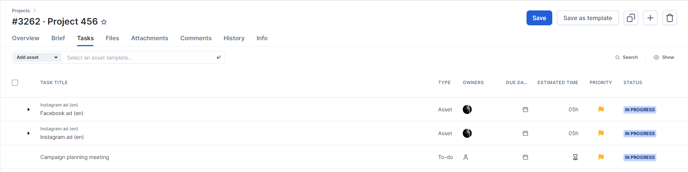
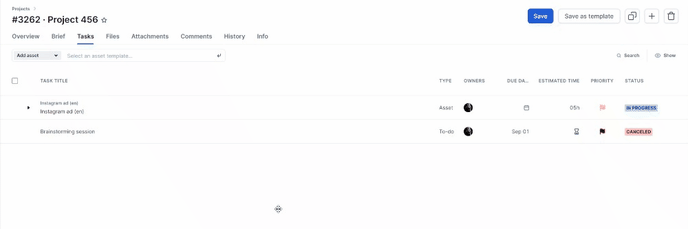
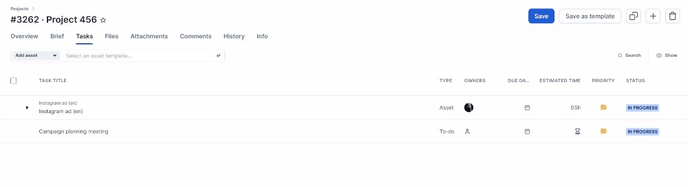
Tasks
When creating the project template, you can also define which tasks it will have. If you do, just access the Tasks menu on the top bar to view the activities.
To-dos
By clicking on a to-do activity, Studio opens an area on the right of the screen for you to inform deadlines, responsible parties, and other information.
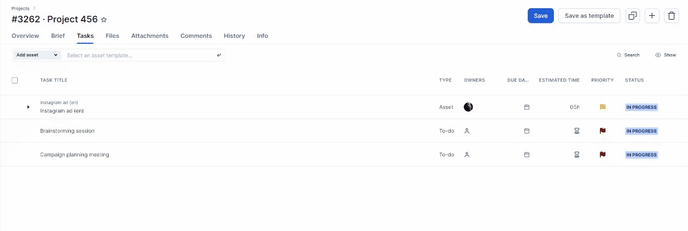
If it is necessary to create new to-dos for the project, just select the type of task and insert the name of the activity in the field "Write a to-do name" and press Enter.
Assets
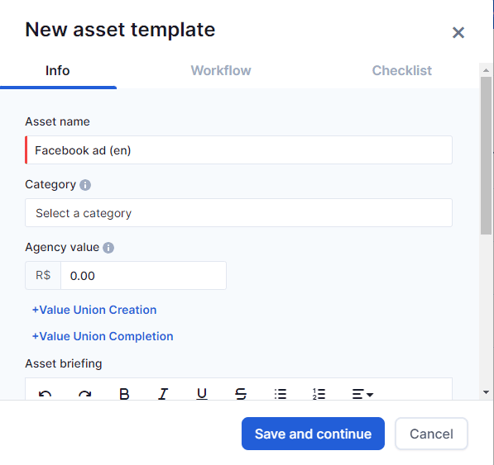
The assets already linked to the project template chosen when opening the project will appear automatically. If you want to add a new asset, just type its name in the "select an asset template" field. If the asset is already registered, just click on its name. If it is not, you can add it by clicking "add".
A pop-up window will open for you to add the asset's information, such as the category, agency value, and the creative brief.
After clicking on "Save and Continue" you can choose one of the workflow templates or create a workflow from scratch.
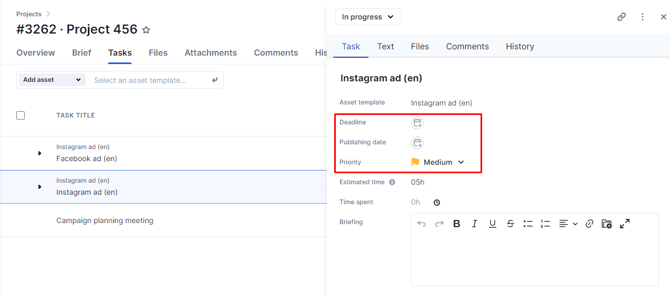
By clicking on the asset, a menu is opened on the right to add the information related it.
In Task, you should add important information such as the deadline, publishing date, and priority.
If the asset's creative brief has not been completed during the registration process, the client services manager can also include this information:

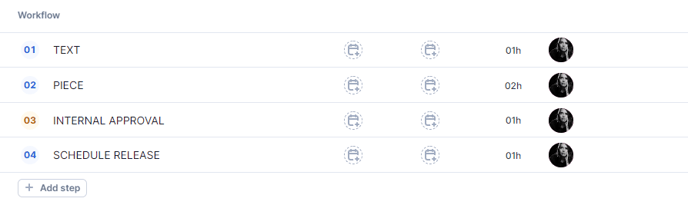
Below, in Workflow, you can set or change the task workflow by selecting the dates and the owners for each step and organizing the order.
Important tip: If there is a specific professional in your agency that handles the assets' traffic among creatives, limit yourself to just adding the asset requested by the customer. This command already signals the agency's traffic about the arrival of new jobs.
The other asset tabs are:
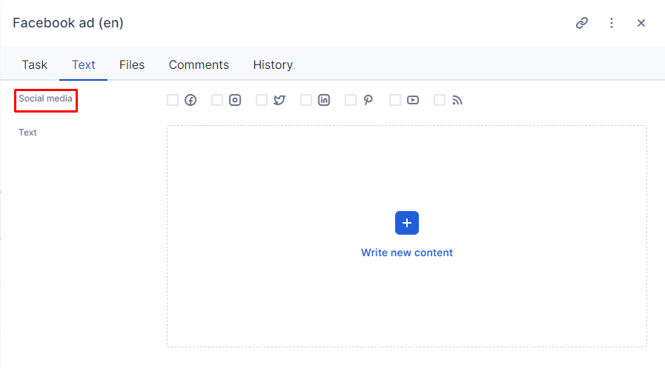
- Text: if the asset is for social media, you can select which ones and specific fields will appear. It is usually the creative staff that will fill this information in the dashboard, but if the client services manager wants to leave a specific comment, it is possible to do that here.
- Files: after the creative staff adds the asset's layout, the client services manager can see it there as well.
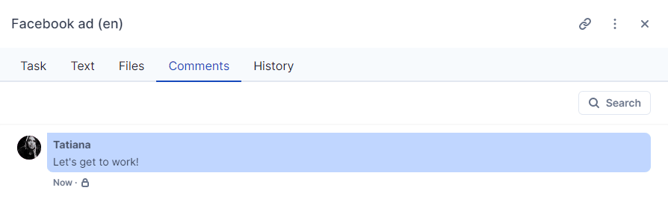
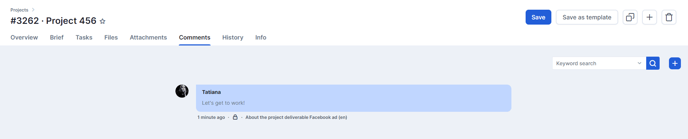
- Comments: both those made by the agency's employees and by the clients through iJob can be viewed in this tab.
At the end of the process, you will have a complete list of the assets that are part of the project. The colored signs on the right bar will indicate their situation in relation to the project's progress.
Files
Here is the place for uploading and viewing the graphics created for each asset. If you want to add a file, just click on "+ New". A pop-up window will open for you to add the image and inform which asset it belongs to.
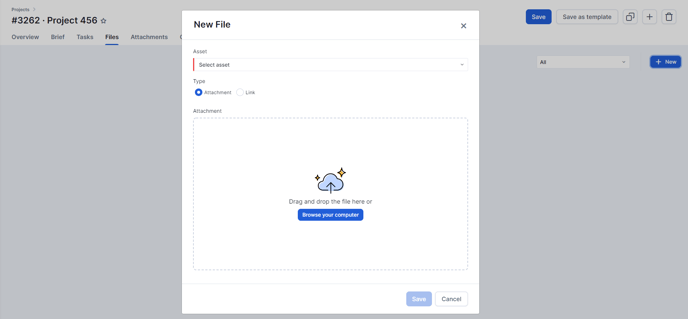
IMPORTANT: This same file inclusion feature is available for the creative department. In this case, the file added by the creation staff will automatically appear on the project screen.
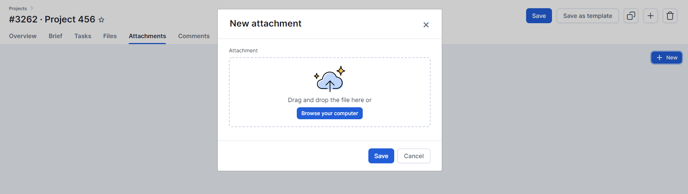
Attachments
Here you can insert various attachments related to the project that have to be shared among the creative team. Just click on the "+ New" button. A pop-up window will open for you to import the file.
Comments
Both those made by the agency's employees and by the clients through iJob can be viewed in this tab. You can also add new comments by clicking on "+".
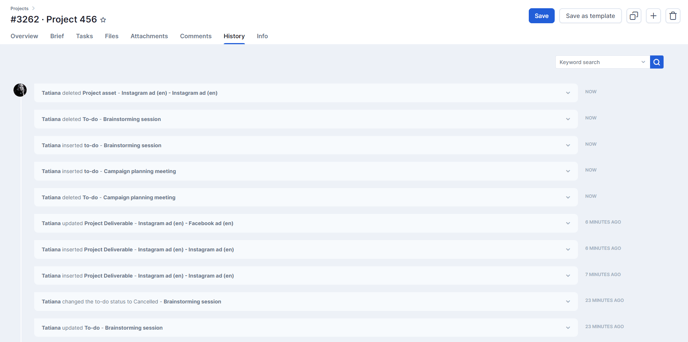
History
Here you can get a full view of all the actions performed in the project.
Info
In the Info tab, you can change the name of the project, add a description, change the status and priority, as well as add an assistant and followers to this project.

After finishing setting it up, just save the project and the demands will be directed to traffic or directly to the responsible parties.
Still need help? Simply reach us at help@rockcontent.com or through the platform chat and we will help you!